close

Home improvement

Home improvement

Expert uPVC window draught proofing and energy efficiency UK

In today’s modern households, maintaining a comfortable living environment is essential. With significant heat loss often occurring through openings, it is crucial to explore effective methods for enhancing your home’s insulation. The Energy Saving Trust highlights that as much as 25% of thermal leakage can be attributed to windows and doors.

This comprehensive guide delves into essential techniques for improving the insulation of your home. By focusing on the structural integrity of your units, you can effectively prevent cold air from entering during the harsh winter months. Furthermore, professional techniques can help secure your home against the elements, leading to a notable reduction in annual consumption levels.

Our expert analysis offers actionable advice for homeowners aiming to boost their property’s thermal performance. Emphasising sustainable maintenance strategies, this guide is designed to help you achieve a more comfortable living space while also being mindful of your environmental impact.

Key Takeaways

  • Up to 25% of heat loss in homes can occur through openings.
  • Improving insulation is vital for maintaining comfort.
  • Professional techniques can significantly reduce energy consumption.
  • Focus on structural integrity to prevent cold air ingress.
  • Actionable advice can enhance thermal performance sustainably.

Introduction to uPVC Window Draught Proofing and Energy Efficiency

A well-insulated living space is vital for enjoying the winter months. It not only enhances comfort but also helps manage rising fuel costs. Research indicates that draughts are a primary contributor to high energy costs in homes during this season.

Identifying the specific source of draughts often involves feeling for cold air around the perimeter of your frames and door seals. Poorly fitted units or structural issues can lead to significant heat loss. This necessitates a thorough inspection of your home’s exterior envelope.

When cold air enters your living space, it often signals that the seals around your windows have begun to degrade. Effective insulation strategies not only improve comfort but also protect your home from long-term damage associated with damp and mould growth.

Benefits of uPVC Windows in Enhancing Home Energy Efficiency

Creating a pleasant atmosphere in a home is crucial for overall well-being. Modern installations can significantly transform living spaces. Homeowners can enjoy improved comfort while simultaneously lowering their monthly bills.

Upgrading to higher-rated models offers substantial financial benefits. For instance, transitioning from G-rated to A+ rated installations can save hundreds of pounds annually for an average semi-detached home.

Here are some key advantages:

  • Improving insulation helps lower monthly bills while maintaining a consistent indoor temperature.
  • Investing in quality draught proofing often results in a noticeable increase in comfort during the coldest months.
  • Long-term savings arise from reduced reliance on heating systems, positively impacting annual expenditure.
  • Modern designs act as thermal barriers, ensuring that the heat you pay for stays inside your home.
Window Rating Annual Savings (£) Comfort Level
G-rated 0 Low
C-rated 100 Medium
A-rated 300 High
A+ rated 500 Very High

Understanding Common Causes of Draughts in uPVC Windows

Creating a welcoming space is essential for enhancing the quality of life. However, over time, certain factors can compromise this comfort. Understanding the common causes of draughts is crucial for maintaining a cosy home.

Standard installations typically last around 20 to 30 years. During this time, components may experience wear and tear, impacting their ability to insulate effectively. Here are some common issues:

  • Natural wear can lead to a decline in thermal insulation.
  • Weathering may cause frames to warp or seals to perish, resulting in draughts.
  • Regular monitoring of your units is vital to prevent structural damage.
  • Ageing materials often fail to maintain a tight seal, increasing heat loss.
  • Identifying signs of degradation early allows for timely repairs, saving costs in the long run.

By being proactive, homeowners can ensure their living spaces remain comfortable and inviting.

Step-by-Step Guide: uPVC window draught proofing and energy efficiency UK

Achieving a comfortable indoor climate requires attention to detail and effective sealing techniques. This guide outlines the necessary tools and materials required to perform effective draught proofing on your existing frames.

Tools and Materials Required for a Successful Job

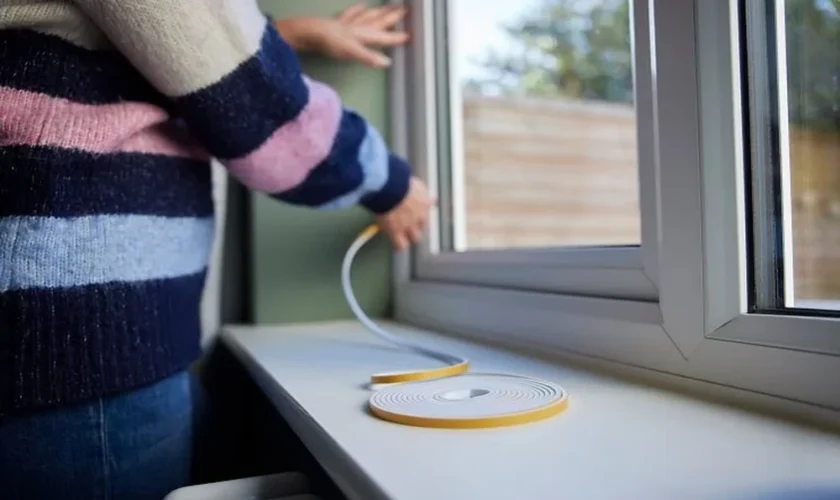
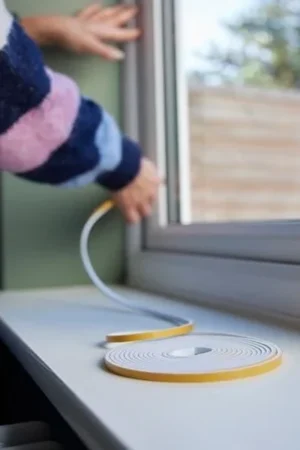
  • Weather-stripping: A common DIY solution for sealing gaps, though it is generally considered a temporary fix.
  • Silicone-based sealant: Ideal for closing small cracks that allow cold air to penetrate your home.
  • Utility knife: Useful for cutting weather-stripping to the desired length.
  • Cleaning supplies: Ensure surfaces are dust-free for better adhesion of sealing materials.

Effective Techniques for Sealing Gaps and Cracks

When sealing gaps, it is important to select the correct size of weather-stripping to ensure a snug fit against the frame. Proper preparation, including cleaning the surface to remove dust, is vital for ensuring that your chosen sealing materials adhere correctly.

Following these steps will help you maintain the efficiency of your units while preventing the ingress of unwanted air. Remember: a well-sealed home not only enhances comfort but also reduces heating costs.

Choosing the Right Draught Proofing Materials for uPVC Windows

The choice of sealing materials can greatly influence indoor comfort. When selecting options for your home, it’s essential to consider durability and ease of installation.

Foam strips are often the most affordable option for DIY insulation. However, they may need replacing more frequently than metal or plastic alternatives.

Metal and plastic strips usually come with integrated brushes or wipers. This design provides a superior level of insulation compared to basic foam options.

Choosing the right materials for your specific window type is crucial. Some strips may not be suitable for sliding sash windows.

Always measure the gap width accurately before purchasing your sealing strips. This helps avoid the common issue of the material being crushed.

Investing in high-quality materials ensures a more durable solution for maintaining the thermal integrity of your units.

“The right materials can significantly enhance your home’s comfort.”

Material Type Durability Cost
Foam Strips Low Low
Metal Strips High Medium
Plastic Strips Medium Medium

Maintenance Strategies for Prolonged Window Efficiency

Caring for your window structures is vital to maintain comfort and efficiency. Regular maintenance helps to prevent issues that could lead to draughts over time. A proactive approach ensures that your home remains cosy throughout the seasons.

Routine care for frames, hinges and seals

To keep your windows in optimal condition, consider the following maintenance tips:

  • Clean window hinges: Perform this task at least once a year to prevent dirt and rust accumulation, which can lead to misalignment.
  • Monitor for misalignment: If hinges feel stiff or misaligned, it may indicate a need for professional cleaning or adjustment.
  • Maintain seals: Regularly check and maintain the seals around your windows to ensure they provide optimal performance throughout changing seasons.

When to seek professional repair and advice

There are times when simple cleaning will not resolve persistent draughts. In such cases, it is crucial to seek expert advice:

  • Regular inspections can help identify potential faults in your window hardware before they lead to significant heat loss or security concerns.
  • Consulting a qualified professional can provide tailored solutions for more complex issues.

Innovative Upgrades and Customisation for uPVC Windows

Exploring new options can significantly improve the thermal performance of living spaces. One effective method is the installation of secondary glazing. This solution is ideal for listed properties where replacing original frames is not allowed. It enhances insulation without compromising the character of the home.

Additionally, advanced sealants can create a robust barrier against external elements. This further boosts the overall performance of existing installations. Homeowners can also consider customisation options that allow them to maintain their property’s aesthetic appeal while integrating modern technology.

  • Secondary glazing effectively enhances thermal performance without altering the property’s character.
  • Advanced sealants provide a strong barrier against the elements, improving overall performance.
  • Customisation options help maintain aesthetic appeal while utilising high-performance technology.
  • Upgrading glazing can reduce noise pollution, enhancing overall comfort.
  • These innovative solutions ensure homes remain warm and secure, even when traditional replacements are not viable.

Industry Insights from Window Doctor UK and Expert Consultation from Window Doctor

Ensuring your home remains comfortable and efficient is a key concern for many homeowners. The experts at Window Doctor UK offer valuable insights into selecting the right products that can significantly enhance your home’s thermal performance.

Consulting with a specialist from Window Doctor can help you navigate the complex range of options available in the market today. This ensures you make informed choices tailored to your specific needs.

Advanced tips from experienced industry professionals

  • Industry professionals at Window Doctor UK provide invaluable guidance on selecting the right products to improve your home’s thermal performance.
  • Consulting with a specialist from Window Doctor allows you to navigate the complex range of energy efficiency options available in the current market.
  • Experienced installers recommend regular maintenance to ensure that your windows continue to function correctly and prevent the ingress of cold draught.
  • Expert advice is essential when planning a full-scale renovation to ensure that your new windows meet the highest standards of energy efficiency.
  • By leveraging professional insights, you can make informed decisions that will benefit your home and reduce your energy consumption for years to come.

For expert advice on high-performance installations and energy-saving solutions, contact the team at Window Doctor UK at 0114 257 1200.

Service Description Contact
Consultation Expert advice on product selection 0114 257 1200
Installation High-performance window installations 0114 257 1200
Maintenance Regular checks to ensure optimal performance 0114 257 1200

Comparing uPVC Windows with Traditional Materials for Energy Efficiency

In an era of rising energy costs, the need for effective thermal solutions has never been more pressing. Homeowners are faced with choices that impact comfort and sustainability. When evaluating options, modern double glazing emerges as a frontrunner.

Compared to traditional timber, the low thermal conductivity of modern materials makes them a superior choice. This feature enhances overall performance, reducing heat loss significantly.

The multi-chambered design of contemporary models traps air effectively, providing an advantage over older, single-glazed installations. Moreover, high-quality units contribute to lower carbon emissions by minimising the amount of energy required for heating.

Unlike timber, which may warp over time, these modern materials maintain their shape and seal. This ensures that heating bills remain manageable, offering peace of mind for homeowners.

Investing in double glazing is a proven way to future-proof your home against rising prices while enhancing overall comfort.

Conclusion

Maintaining a warm and inviting home is essential for overall comfort. Effective draught proofing plays a vital role in reducing the impact of rising energy bills. By addressing gaps around your doors and windows, you can significantly enhance your property’s insulation throughout the year.

Whether opting for simple draught excluders or investing in new secondary glazing, every action helps to minimise heat loss. If your current installations are beyond repair, replacing them with modern alternatives is a long-term investment that boosts both comfort and property value.

Consulting with experts like Window Doctor UK ensures your home remains secure and energy-efficient. Taking these proactive measures will help maintain a cosy sanctuary, regardless of the weather outside.

FAQ

What are the signs that my windows need draught proofing?

Common signs include noticeable cold air entering the home, increased heating bills, and visible gaps around the window frames. If curtains or blinds move when there is no breeze, it may indicate a draught.

How can draught proofing improve my home’s energy efficiency?

By sealing gaps and cracks, draught proofing reduces heat loss, which can lead to lower heating bills and a more comfortable living environment. It helps maintain a consistent indoor temperature.

What materials are best for sealing gaps in windows?

Effective materials include foam strips, metal or plastic seals, and weatherproofing tape. Each option has its benefits, so choosing the right one depends on the specific needs of the windows.

Is it possible to draught proof sash windows?

Yes, sash windows can be draught proofed using specific techniques and materials designed for their unique structure. This can significantly enhance their insulation properties.

How often should I check my windows for draughts?

It is advisable to inspect windows at least once a year, especially before the colder months. Regular checks help identify any wear and tear that may affect insulation.

Can I do draught proofing myself, or should I hire a professional?

Many homeowners can successfully draught proof their windows with the right tools and materials. However, for complex issues or older windows, seeking professional advice may be beneficial.

What are the long-term benefits of draught proofing?

Long-term benefits include reduced energy bills, improved comfort levels, and enhanced property value. Proper insulation can also extend the lifespan of windows and heating systems.

Are there any government schemes to assist with energy efficiency improvements?

Yes, various government schemes may offer financial assistance or incentives for energy efficiency upgrades, including draught proofing. It is worth checking local initiatives for available support.
read more
Home improvement

Modern Light Switches: How Small Hardware Updates Change a Room

The Design Opportunity in Light Switches

Light switches are the most touched hardware in any home and among the most overlooked in design planning. Standard white rocker switches – installed in the vast majority of homes – are functionally adequate and visually negligible in the wrong direction. They do not enhance a wall’s appearance; they interrupt it. Against a painted or wallpapered wall, the standard white switch plate is an assertion of functional necessity that a more considered alternative could express differently.

The design opportunity is not primarily about switch plates – the visible cover plate around the switch – though decorative switch plates are available in many finishes and profiles. The more meaningful opportunity is the switch mechanism itself: replacing standard rocker switches with dimmers, touch-sensitive controls, or smart switches that combine control and dimming with scheduling and remote operation.

The improvement from dimmer installation specifically is among the highest-return electrical updates available. A standard switch gives two options – fully on and fully off. A dimmer gives infinite gradation between those states, which fundamentally changes how a room can be used across different activities and times of day.

Dimmer Installation and LED Compatibility

Modern light switches that include dimmer capability require compatibility with the specific LED fixtures they control. Early LED technology had compatibility issues with standard incandescent dimmers – flickering, buzzing, and limited range were common. Current LED-specific dimmers address these issues, and most current LED fixtures specify compatible dimmer brands or models. Confirming compatibility before purchasing the combination of fixture and dimmer prevents discovering incompatibility after installation.

Single-pole dimmers replace single-pole switches – the standard configuration for a fixture controlled from one switch location. Three-way dimmers control a fixture from two switch locations (top and bottom of stairs, two entrances to the same room) and require both switch locations to be upgraded to three-way dimmer switches for the system to work correctly.

Smart switches – which combine dimming control with Wi-Fi connectivity, scheduling, and remote operation – are available at price points that make them practical for standard residential installation. The installation process is the same as a standard dimmer; the additional capability is in the control options. For rooms where lighting scene automation is useful – bedrooms, living rooms, home theaters – smart switches provide that capability without requiring smart bulbs.

Energy Star certified smart switches confirm that the control electronics meet efficiency standards and that the standby power consumption of the switch itself is within acceptable limits.

Switch Plate Finishing for a Cohesive Look

Matching switch plate finishes to other hardware in the room – door handles, hinges, light fixture finishes – creates the visual coherence that makes a room feel considered in its details. Standard white switch plates in a room with matte black hardware and fixtures are a detail that registered designers change; standard white plates in a room where all other hardware is white are simply appropriate.

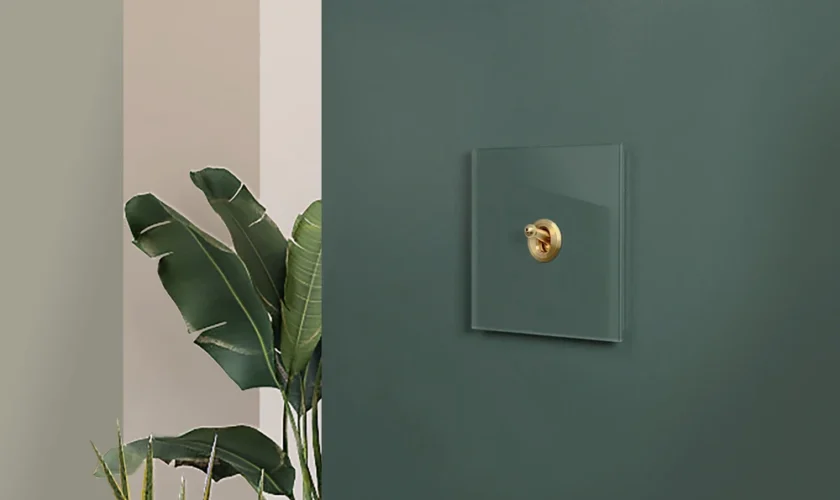
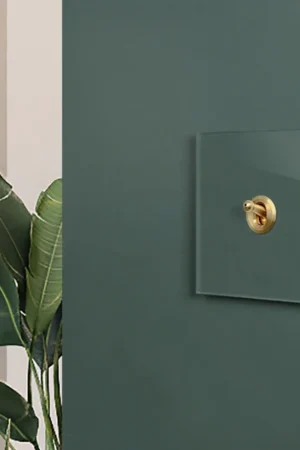
The variety of switch plate materials and profiles available has expanded significantly. Screwless Decora-style plates in brushed nickel, matte black, and polished chrome are widely available; brushed brass and other warm-finish options are increasingly accessible. The incremental cost of a coordinating switch plate over a standard white one is modest; the visual contribution to a room that has been thoughtfully finished is disproportionate to that cost.

The installation of switch plates requires only a screwdriver and is among the most accessible home improvement tasks available. The five minutes required to replace a standard white plate with a coordinating finish plate is among the highest design value per unit of time of any task in home renovation.

read more
Home improvement

Smart Home Electrical Upgrades That Improve Safety and Efficiency

Your home’s electrical system probably isn’t something you think about very often. It works quietly in the background, powering lights, appliances, heating and cooling equipment, chargers, and countless other devices. But as homes become more dependent on technology, older electrical systems can struggle to keep up. For homeowners considering electrical support in Emmaus, PA, the right upgrades can improve both everyday convenience and electrical safety.

A smart electrical upgrade isn’t necessarily about adding the latest gadget. In many cases, it’s about making sure the home’s wiring, outlets, lighting, and electrical panel are equipped for the way the property is actually being used.

Start With the Electrical Panel

The electrical panel is the central point where electricity enters and is distributed throughout your home. If the panel is outdated or doesn’t provide enough capacity, adding more appliances and technology can put unnecessary strain on the system.

Older homes may have electrical panels that were designed for a very different level of household demand. Today’s homes can have multiple televisions, computers, kitchen appliances, air conditioning systems, electric vehicles, and other high-demand equipment operating throughout the day.

An electrical inspection can help determine whether the existing panel is suitable for the home’s current needs. In some situations, an upgrade may provide additional capacity and improve the overall reliability of the electrical system.

Upgrade Outlets Where You Need Them

A surprising amount of modern electrical convenience comes down to having enough outlets in the right places.

When a room doesn’t have sufficient outlets, homeowners may rely heavily on extension cords and power strips. While these can be useful in appropriate situations, they aren’t a substitute for properly installed permanent outlets.

Adding outlets in frequently used areas can make the home easier to use while reducing the need for tangled cords. This can be particularly helpful in home offices, kitchens, bedrooms, entertainment areas, and garages.

Consider modern outlet features

Some outlet upgrades can also add useful functionality without requiring major changes to the home.

  • USB charging outlets can provide convenient charging for phones, tablets, and other devices without occupying a standard receptacle.
  • GFCI protection can help protect against electrical shock in areas where electricity may come into contact with moisture, such as kitchens, bathrooms, garages, and outdoor locations.
  • AFCI protection can help reduce certain electrical fire risks by detecting potentially dangerous arcing conditions in applicable circuits.

The appropriate protection depends on the location and the electrical configuration of the home.

Make Lighting More Efficient

Lighting is another area where a relatively simple electrical upgrade can change how a home feels and functions.

LED lighting generally uses less energy than traditional incandescent bulbs and can provide a long service life. Replacing older fixtures or bulbs with efficient alternatives can help reduce energy consumption while giving homeowners more control over lighting.

Smart switches and dimmers can add another layer of convenience. Instead of relying entirely on basic wall switches, homeowners can control lighting levels and, with compatible systems, create schedules or operate lights remotely.

However, smart lighting doesn’t have to mean turning your entire house into a connected system. A few carefully chosen upgrades in high-use areas may be enough to make a noticeable difference.

Improve Electrical Safety in Older Homes

Convenience is useful, but safety should come first when considering electrical improvements.

Older wiring, damaged outlets, loose connections, and overloaded circuits can create risks that aren’t always visible. Warning signs such as flickering lights, buzzing outlets, warm switches, frequent breaker trips, or a burning odor should never be treated as normal.

If you notice any of these changes, stop using the affected equipment or circuit when appropriate and have the issue evaluated by a qualified electrician.

Signs your electrical system deserves attention

Some electrical problems develop gradually rather than failing suddenly. Pay attention if you notice:

  • Lights that flicker when appliances switch on.
  • Breakers that trip repeatedly without an obvious reason.
  • Outlets that feel warm or show signs of discoloration.
  • Sparks, buzzing, or crackling sounds from electrical fixtures.
  • A frequent need for extension cords or power strips.

These symptoms can have different causes, so they shouldn’t be used to diagnose a specific fault on their own.

Prepare Your Home for Modern Appliances

Electrical demand can change significantly when you add major appliances. An electric range, heat pump, hot tub, workshop equipment, or electric vehicle charger may require dedicated electrical capacity.

Before installing high-demand equipment, it’s worth determining whether your existing electrical system can safely support it.

Simply adding a new appliance to an already heavily loaded circuit isn’t a good long-term solution. A professional can assess the panel, wiring, circuit capacity, and installation requirements before the equipment is connected.

Planning ahead can also help prevent inconvenient electrical upgrades after an appliance has already been purchased.

Don’t Forget Outdoor Electrical Needs

Outdoor spaces increasingly function as extensions of the home. Lighting, security cameras, entertainment equipment, landscaping features, and outdoor kitchens can all require reliable electrical connections.

Outdoor electrical installations need to be designed with weather exposure in mind. Appropriate equipment and protection are important because moisture can create additional electrical hazards.

Rather than running indoor extension cords through doors or windows, consider having permanent outdoor outlets installed where they’re actually needed.

Build a Smarter System Gradually

You don’t have to upgrade your entire electrical system at once. In fact, approaching improvements in stages can make it easier to focus on the areas that matter most.

Start with safety concerns and outdated components. From there, consider improvements that address everyday frustrations, such as inadequate outlets, poor lighting, or insufficient capacity for new appliances.

This approach allows homeowners to improve the electrical system according to their actual needs rather than spending money on features that may provide little practical benefit.

A Safer, More Efficient Home Starts With the Basics

Smart electrical upgrades aren’t only about technology. They are about creating an electrical system that matches the way your household lives today.

An upgraded panel can provide appropriate capacity, additional outlets can reduce dependence on extension cords, modern lighting can improve efficiency, and proper electrical protection can help address important safety concerns.

Before making significant changes, have the existing system evaluated. Understanding its condition and capacity makes it much easier to decide which upgrades are worthwhile.

Conclusion

A home’s electrical system needs to evolve as household needs change. New appliances, connected devices, home offices, outdoor equipment, and charging needs can all increase electrical demand over time.

The best upgrades are those that solve real problems while improving safety, reliability, and everyday convenience. Whether you’re updating an older electrical panel, adding outlets, improving lighting, or preparing for a high-demand appliance, professional planning can help ensure the work is appropriate for your home’s existing system.

====================================================

read more
Home improvement

How PU Grouting Seals Leaks in Concrete Slabs

Basement car parks in Singapore condominiums often develop a particular kind of problem: water tracking along a construction joint or through a hairline crack in the slab, appearing as a damp line or an active drip whenever the water table rises after sustained rain. Surface coatings cannot fix this because the water is moving through the concrete itself under pressure, not sitting on top of it. This is exactly the situation polyurethane grouting was developed to solve, and it explains why the technique has become a standard tool for basements, lift pits, and other below-grade structures across the island.

What Polyurethane Grouting Actually Is

PU grouting involves injecting a liquid polyurethane resin directly into a crack, joint, or void within a concrete structure, where it reacts with moisture or a separate catalyst and expands to fill the gap from the inside out. Unlike a surface-applied membrane, which blocks water from a face of the structure, the injected resin becomes part of the crack itself, forming a flexible seal that can accommodate a small amount of ongoing movement without breaking the bond. This makes it particularly suited to structures that continue to shift slightly over time, such as basement walls subject to changing groundwater pressure or slabs that experience minor thermal expansion and contraction.

Why Active Leaks Need a Different Approach

A crack that is actively weeping or dripping water cannot simply be patched from the surface, because standard cementitious repair materials need a reasonably dry substrate to bond properly, and any coating applied over active water pressure tends to blister or get pushed off before it cures. PU grouting sidesteps this problem entirely, since the resin is designed to react with the water present in the crack rather than being defeated by it. In basement conditions where pumping out the water long enough for a dry repair simply isn’t practical, injection becomes the only realistic method available.

Locating and Drilling Injection Ports

Before any resin goes in, the contractor maps the full path of the crack or joint, since water entering at one visible point often travels some distance through the concrete before it appears on the interior face. Injection ports, small packers set into holes drilled at an angle intersecting the crack, get installed at intervals along this path, angled to meet the defect roughly at its mid-depth through the slab or wall rather than just at the surface. Spacing and depth here are judgment calls that depend on the width of the crack and the thickness of the concrete section, and getting this step wrong is one of the more common reasons a first injection attempt does not fully stop a leak.

Injecting the Resin Under Controlled Pressure

Resin gets pumped through each port using a specialised injection pump, working from the lowest point of the crack upward so the material fills progressively rather than bypassing sections. Pressure needs to be high enough to force the resin through the full width and depth of the crack network but controlled enough not to force material out through an unintended path, which is part of why this work benefits from contractors with hands-on injection experience rather than a general handyman with a caulking gun. A detailed look at how this process gets planned and executed on real Singapore projects is available in this overview of polyurethane grouting strategies for waterproofing, which covers material selection and site sequencing in more depth.

Hydrophilic Versus Hydrophobic Resin Formulations

Not all polyurethane grouts behave the same way once injected. Hydrophilic formulations absorb water as part of their curing reaction and expand accordingly, making them well suited to sealing construction joints that see continuous low-level moisture. Hydrophobic formulations, by contrast, react with water to form a rigid, closed-cell foam that repels further moisture, which tends to suit fast-moving active leaks where stopping the flow quickly matters more than long-term flexibility. Choosing between the two, or combining both in a single crack, depends on how the water is behaving at that specific location rather than a fixed rule that applies to every job.

Checking the Seal Before Calling the Job Done

Once the resin has fully cured, usually within a matter of hours depending on the formulation and site temperature, the injection ports get cut back flush and patched over with a cementitious mortar to leave a clean finish. A proper job does not end there, though; the area needs to be observed through at least one further wet cycle, whether that means the next heavy rainstorm for a basement wall or a deliberate water test for a slab, to confirm the leak has actually stopped rather than simply slowed. Contractors who skip this verification step sometimes hand over a repair that looks finished but is only partially effective, leaving the homeowner or building management to discover the gap the next time water pressure builds up.

Where This Technique Fits in Singapore Buildings

PU grouting shows up most often in basement car parks, lift pits, retaining walls, and construction joints in structures built below the water table, all common features in condominium developments with multiple basement levels. It also appears in landed home settings where a swimming pool shell or a below-ground rainwater tank develops a leak that surface waterproofing cannot reach. Because the technique addresses the crack directly rather than covering the surrounding area, it often costs less and disrupts a building far less than an alternative that would require excavating from the outside to reach the same defect.

read more
Home improvement

Central Air vs. Ductless Cooling: Which Is Better for Your Home? 

Choosing the right cooling system is one of the most important decisions homeowners make when upgrading or replacing their HVAC equipment. While traditional central air conditioning has been the standard for decades, ductless mini-split systems have grown in popularity thanks to their flexibility and energy efficiency.

The best option depends on your home’s layout, your budget, and your comfort goals. Whether you’re building a new home, renovating an older property, or replacing an outdated unit, understanding the differences between these two cooling solutions can help you make an informed choice. Homeowners researching central air conditioners Flemingsburg, KY often compare these systems to determine which one offers the best long-term value for their specific needs.

How Central Air Conditioning Works

A central air conditioning system cools your entire home using a network of ducts. The system includes an outdoor condenser, an indoor evaporator coil, and a blower that circulates cooled air through vents located in each room.

This setup is ideal for homes that already have ductwork installed. Once the thermostat reaches the desired temperature, the system distributes cool air evenly throughout the house, maintaining consistent indoor comfort.

Because central air cools the entire home at once, it provides a seamless experience with minimal temperature differences between rooms.

Understanding Ductless Mini-Split Systems

Ductless mini-split systems consist of an outdoor compressor connected to one or more indoor air-handling units. Instead of using ducts, refrigerant lines connect the outdoor and indoor components.

Each indoor unit operates independently, allowing homeowners to control the temperature in individual rooms or zones. This flexibility makes ductless systems especially attractive for homes without existing ductwork, room additions, garages, and converted basements.

Installation is generally less invasive than adding a full duct system since only a small opening is required for the refrigerant lines.

Installation Considerations

One of the biggest differences between these cooling options is installation.

Central Air

Installing central air is relatively straightforward if your home already has ducts in good condition. However, homes without existing ductwork may require significant remodeling to install air distribution channels, increasing both labor and material costs.

Ductless Systems

Mini-splits are much easier to install in homes without ducts. Indoor units can be mounted on walls, ceilings, or floors, making them adaptable to many different spaces.

If you’re adding cooling to a single room or an older home where installing ducts would be difficult, ductless systems often provide a practical solution.

Energy Efficiency

Energy efficiency is a major factor when comparing cooling systems.

Central Air Efficiency

Modern central air conditioners are far more efficient than older models, especially those with higher Seasonal Energy Efficiency Ratio (SEER2) ratings. However, ductwork can reduce overall efficiency if leaks or poor insulation allow cooled air to escape.

Properly sealed and maintained ducts help minimize these energy losses.

Ductless Efficiency

Ductless systems eliminate duct-related energy losses altogether. They also allow homeowners to cool only occupied rooms instead of the entire house, reducing unnecessary energy use.

Many mini-splits also feature inverter technology, which adjusts compressor speed based on cooling demand instead of constantly turning on and off. This can result in lower electricity consumption and improved indoor comfort.

Comfort and Temperature Control

Comfort goes beyond simply lowering the indoor temperature.

Central air systems provide consistent cooling throughout the home with a single thermostat. This works well for families who prefer maintaining one comfortable temperature across all rooms.

Ductless systems offer individualized climate control. Each indoor unit has its own thermostat, allowing different family members to customize temperatures in separate rooms.

This zoning capability is especially useful in larger households where personal comfort preferences vary.

Appearance and Space Requirements

Aesthetics can also influence your decision.

Central air systems remain largely hidden from view. The indoor components are concealed within walls, ceilings, and utility areas, while only supply vents are visible.

Ductless units, on the other hand, are mounted inside living spaces. Although modern designs are more compact and attractive than earlier models, some homeowners prefer the nearly invisible appearance of central air.

Outdoor space requirements are similar for both systems since each uses an exterior condenser unit.

Maintenance Needs

Both systems require routine maintenance to perform efficiently and extend equipment lifespan.

For central air systems, homeowners should:

  • Replace air filters regularly.
  • Keep outdoor units free of debris.
  • Schedule annual professional inspections.
  • Have ductwork inspected periodically for leaks.

Ductless systems also require regular filter cleaning and professional servicing. Because each indoor unit contains its own filter, homes with multiple zones may require more frequent cleaning.

Routine maintenance helps preserve efficiency and prevents unnecessary wear on either type of system.

Cost Comparison

Initial installation costs vary depending on the home.

Central air is often more affordable when existing ductwork is already in place. However, adding ducts to a home can substantially increase installation expenses.

Ductless systems usually have a lower installation cost for homes without ducts but may become more expensive if multiple indoor units are needed to cool an entire house.

Long-term operating costs depend on system efficiency, home insulation, local climate, and how frequently the system is used.

Which System Is Right for Your Home?

There is no universal answer because every home has unique requirements.

Central air may be the better choice if:

  • Your home already has ductwork.
  • You want consistent whole-home cooling.
  • You prefer equipment hidden behind walls and ceilings.
  • You plan to cool every room equally.

A ductless system may be a better fit if:

  • Your home lacks ductwork.
  • You’re cooling only certain rooms.
  • You want independent temperature control.
  • You’re adding climate control to an addition or converted space.

Many homeowners even combine both technologies, using central air for the main living areas and ductless units for additions, bonus rooms, or detached buildings.

Final Thoughts

Both central air conditioning and ductless mini-split systems offer dependable, efficient cooling when properly selected and maintained. The right choice depends on your home’s design, your budget, and how you use each living space.

Before making a decision, consider installation costs, long-term energy savings, maintenance requirements, and your family’s comfort preferences. Consulting with a qualified HVAC professional can help evaluate your home’s layout and recommend the solution that delivers the best balance of efficiency, performance, and value. By carefully weighing the advantages of each system, you’ll be better prepared to invest in a cooling solution that keeps your home comfortable for many summers to come.

read more
Home improvement

Why Timely Repairs Are Crucial for Garage Door Safety and Performance

A garage door is more than just an entryway or a piece of hardware. When neglected, it can become a silent hazard and a source of unexpected cost or heartbreak. Yet, many homeowners and businesses delay repairs, missing subtle warning signs until a minor issue becomes a crisis.

The Hidden Dangers of Delaying Garage Door Repairs

The soft groan of an unbalanced door or the brief hesitation before it closes may feel like minor annoyances. In reality, these symptoms often point to deeper problems. Springs under tension, frayed cables, and misaligned sensors put anyone near the door at risk. A malfunctioning sensor may not detect a person or pet, while a snapped cable can send a heavy door crashing down unexpectedly. These aren’t hypothetical scenarios. Emergency rooms see countless injuries each year from garage door accidents that could have been prevented with timely maintenance.

Over time, ignored problems only compound. A small misalignment strains other parts, causing openers to wear out prematurely and tracks to bend. What starts as a $50 fix can turn into a full replacement costing thousands. Real-life incidents are sobering, families trapped in garages, vehicles damaged by falling doors, or businesses forced to shut operations during costly downtime.

Comparing Emergency Repairs vs. Scheduled Maintenance

Waiting until a garage door fails can feel like saving money in the short term, but the bills add up fast in an emergency. After-hours call-out fees, rush shipping for parts, and secondary damage to property can triple the cost of routine maintenance.

On the other hand, scheduling proactive inspections catches worn parts before they break. A technician lubricates, adjusts, and tests crucial systems, preventing sudden breakdowns. The benefits are clearer for commercial and industrial properties, where downtime means lost revenue. While DIY fixes might tempt handy owners, many repairs (like spring replacements) are physically dangerous and require specialized tools.

Impact of Timely Repairs on Garage Door Performance

A garage door that runs smoothly every time is no accident. Regular upkeep eliminates jerky movements and noisy operation. Parts like rollers and hinges stay in prime condition, extending the lifespan of the entire system. This not only saves on major repairs but also keeps the door properly sealed, improving insulation against weather and reducing drafts.

For homeowners, that means lower energy bills in winter. For businesses, it means keeping products and machinery safe from temperature swings. Small problems like warped seals or loose panels, when fixed promptly, help maintain the door’s weatherproofing. The long-term impact is felt not just in performance but in everyday comfort and reliability.

Residential, Commercial, and Industrial Garage Doors: Unique Repair Needs

No two garage doors are quite the same. Residential models often prioritize quiet operation and aesthetics, using different mechanisms from the heavy-duty doors in warehouses or the rapid-acting versions on loading docks. Each has unique safety protocols; a home’s door might need photo-eye sensor alignment, while a factory door could require safety edges and interlocks.

Specialized repair services understand these differences. They can source commercial-grade panels or suggest upgrades like high-speed openers for busy facilities. Even the opening frequency matters, a door opening 10 times a day at home faces far less wear than one cycling 100 times in a commercial lot. Tailoring repairs to these variables is essential for safety and efficiency.

Evaluating Repair Solutions: Traditional Methods vs. Modern Technologies

Some repairs involve tried-and-true manual adjustments, like rebalancing springs or replacing worn cables. Others open the door (literally and figuratively) to high-tech upgrades. Today’s garage doors can feature advanced safety sensors, smart controls, and automatic locking systems.

Deciding whether to upgrade during a repair should be a thoughtful choice. Newer technologies can improve safety and allow mobile monitoring, but not every door needs a complete overhaul. For some, a simple part replacement is enough, while others might benefit from integrating a smart opener for added convenience.

Selecting the Right Repair Service Provider

Not every technician is created equal. Certified installers have the training to handle both traditional and modern systems, ensuring safety standards are met. Brand-specific expertise is critical. For example, Garaga-certified professionals understand the nuances of proprietary mechanisms and warranties.

Emergency availability is another differentiator. When something goes wrong at 2 a.m., fast, reliable service matters. The team at Dor Docteur réparation portes de garage has built a reputation for expertise and responsiveness across residential, commercial, and industrial sectors in Quebec, a vital resource when reliability can’t be compromised.

Long-Term Benefits of Investing in Timely Repairs

Neglect leads to expensive replacements, downtime, and headaches. Regular repairs help property owners avoid these burdens while preserving the value of their investment. Insurance companies often require proof of proper maintenance for claims and coverage, making a well-maintained door more than just a convenience, it’s financial protection.

Above all, timely repairs grant peace of mind. Knowing your garage door will open on cue and protect your property from both intruders and the elements is a comfort that outlasts any up-front cost. In the world of garage doors, the safest doors are the ones you never have to think about, because the right attention kept them that way.

read more
Home improvement

Buzzing, Flickering, or Dim Garage Lights: Warning Signs Austin, Texas Homeowners Should Never Ignore

For many homeowners in Austin, Texas, the garage is no longer just a place to park a vehicle. It has become a home gym, workshop, storage area, hobby room, charging station for electric vehicles, and even a place where families gather during projects or game nights. Because garages are being used more heavily than ever, electrical systems in these spaces are under constant stress.

When garage lights begin buzzing, flickering, dimming unexpectedly, or cutting out entirely, many homeowners assume it is a minor inconvenience. In reality, those symptoms can point to serious electrical hazards hiding behind walls, inside outlets, or within the breaker panel itself. Ignoring these warning signs can increase the risk of electrical fires, damaged appliances, or dangerous shock hazards.

Working with a Trusted Residential Electrician In Austin, TX is one of the smartest ways to identify the source of these issues before they become costly emergencies. Electrical problems often start small, but they rarely stay that way.

Why Garage Lighting Problems Should Never Be Ignored

A garage experiences unique electrical demands compared to other parts of the home. In many Austin homes, garages are exposed to intense Texas heat, dust, moisture intrusion during storms, pests, vibration from garage doors, and heavy appliance usage. All of these conditions can wear down electrical components over time.

If your garage lights are acting strangely, your electrical system may already be warning you that something deeper is wrong.

Some of the most common warning signs include:

  • Flickering lights
  • Buzzing or humming fixtures
  • Lights dimming when appliances start
  • Burning smells near switches or outlets
  • Warm light switches
  • Frequently tripped breakers
  • Sparking outlets
  • Intermittent lighting failures
  • Dead outlets in the garage
  • Lights that suddenly become brighter or dimmer

These symptoms are not simply “annoying.” They can indicate dangerous electrical conditions that require professional diagnosis.

Flickering Garage Lights Could Signal Loose Electrical Connections

One of the most common causes of flickering garage lights is a loose electrical connection somewhere in the circuit. Loose wiring connections create resistance, and resistance creates heat. Over time, this heat can damage wires, melt insulation, and increase the risk of electrical arcing.

Arcing occurs when electricity jumps through gaps in damaged connections. This is one of the leading causes of electrical fires in residential homes.

Austin homeowners sometimes notice flickering lights when:

  • The garage door opener activates
  • Power tools are plugged in
  • A refrigerator or freezer cycles on
  • An EV charger begins charging
  • Multiple devices run simultaneously

These situations may indicate the circuit is overloaded or that a connection inside the panel, switch, or fixture is deteriorating.

A Trusted Residential Electrician In Austin, TX can safely inspect the wiring, test the circuit load, and identify whether the problem originates from the fixture itself, damaged wiring, or the electrical panel.

Buzzing Sounds Often Point to Dangerous Electrical Problems

Electricity should never make noticeable noise. If your garage light fixture, switch, or breaker panel produces buzzing or humming sounds, there is often an underlying issue that needs immediate attention.

Buzzing can be caused by:

  • Loose wiring
  • Faulty breakers
  • Damaged switches
  • Aging fluorescent ballasts
  • Overloaded circuits
  • Improper grounding
  • Poor electrical installation work

In some cases, buzzing fixtures may indicate that electrical current is arcing internally. Arcing can produce significant heat and should never be ignored.

Many older Austin homes still contain aging electrical components that were never designed to handle modern garage power demands. Adding refrigerators, power tools, deep freezers, gym equipment, or EV chargers can push older systems beyond their intended capacity.

Dim Garage Lights May Mean Your Circuit Is Overloaded

If your garage lights dim when equipment turns on, your electrical system could be struggling to distribute power properly.

This often happens when:

  • Too many devices share one circuit
  • The breaker is undersized
  • Wiring is damaged
  • The panel is outdated
  • Voltage drops occur under load

Modern garages frequently consume far more electricity than builders anticipated decades ago. Homeowners today commonly operate:

  • Air compressors
  • Power saws
  • Welding equipment
  • Electric vehicle chargers
  • Portable AC units
  • Workout equipment
  • Extra refrigerators or freezers

When these devices compete for power on overloaded circuits, the lighting system often becomes unstable.

A Trusted Residential Electrician In Austin, TX can determine whether your garage requires:

  • Dedicated circuits
  • Panel upgrades
  • New wiring
  • Breaker replacements
  • Additional outlets
  • Improved grounding systems

Improper Grounding Creates Serious Shock Risks

Grounding is one of the most important safety features in any electrical system. A properly grounded system helps safely direct stray electrical current away from people and equipment.

Unfortunately, improper grounding is a surprisingly common issue in older homes and DIY electrical projects.

Signs of grounding problems may include:

  • Tingling sensations when touching metal surfaces
  • Flickering lights
  • Repeated breaker trips
  • Appliance damage
  • Electrical shocks
  • Inconsistent power

Garages are especially vulnerable because they often contain concrete flooring, metal fixtures, water exposure, and heavy-duty electrical equipment.

Improper grounding can become extremely dangerous when combined with damaged wiring or moisture intrusion. This is why professional electrical inspections are so important whenever garage lighting problems appear.

Rodent Damage Is More Common Than Many Austin Homeowners Realize

Rodents frequently enter garages seeking shelter from Texas heat and seasonal weather changes. Unfortunately, rats and mice are notorious for chewing through electrical wiring insulation.

Damaged wiring from rodents can lead to:

  • Short circuits
  • Flickering lights
  • Exposed wires
  • Breaker trips
  • Electrical fires

Many homeowners never realize rodents are the cause until a licensed electrician opens the wall or attic space during an inspection.

Warning signs of rodent-related electrical damage may include:

  • Scratching noises in walls
  • Unexplained electrical failures
  • Burn smells
  • Intermittent power loss
  • Visible droppings near wiring

If your garage lighting problems appear suddenly without explanation, hidden pest damage may be part of the issue.

Damaged Wiring Should Always Be Treated Seriously

Electrical wiring naturally deteriorates over time due to:

  • Heat exposure
  • Moisture
  • Age
  • Physical damage
  • Corrosion
  • Poor installation practices

Garage wiring is especially vulnerable because garages experience more temperature fluctuations than climate-controlled living spaces.

In Austin’s intense summer heat, aging insulation can become brittle and crack. Once insulation fails, wires become exposed and dangerous.

Some homeowners notice symptoms like:

  • Lights cutting in and out
  • Burn marks around outlets
  • Warm switches
  • Popping sounds
  • Sudden breaker trips

These are not issues to postpone. Damaged wiring can escalate quickly and should be evaluated immediately by a licensed electrician.

Should Garage Electrical Repairs Be a DIY Project?

Many homeowners enjoy handling projects around the house themselves. Painting, shelving installation, and basic maintenance are often reasonable DIY tasks. However, electrical repair work is very different.

When garage lighting problems involve wiring, breakers, grounding, or overloaded circuits, this work should generally be left to licensed professionals.

DIY electrical work can create major risks, including:

  • Fire hazards
  • Shock hazards
  • Code violations
  • Insurance claim complications
  • Hidden wiring damage
  • Improper breaker sizing
  • Unsafe grounding

Texas electrical codes exist for a reason. Licensed electricians are trained to safely diagnose and repair electrical systems while ensuring everything meets current safety standards.

A handyman or inexperienced DIY installer may unknowingly create hidden hazards behind walls that do not become obvious until months or years later.

For example:

  • Loose wire connections may appear functional initially
  • Incorrect wire sizing may overheat slowly over time
  • Improper grounding may go unnoticed until a fault occurs
  • Overloaded circuits may worsen as more devices are added

This is why many homeowners ultimately choose a Trusted Residential Electrician In Austin, TX rather than risking dangerous mistakes.

Why Licensed Electricians Matter in Austin Homes

Licensed electricians receive extensive training in:

  • Electrical safety
  • National Electrical Code compliance
  • Load calculations
  • Proper grounding techniques
  • Circuit protection
  • Safe installation methods
  • Troubleshooting hidden electrical faults

Professional electricians also have specialized testing equipment that helps identify issues homeowners cannot easily see.

An experienced electrician can:

  • Detect overheating connections
  • Identify overloaded circuits
  • Locate hidden wiring damage
  • Test grounding systems
  • Inspect breaker panel safety
  • Recommend long-term electrical upgrades

This becomes especially important in garages where electrical demand continues increasing due to modern technology and appliance usage.

Garage Lighting Problems Often Get Worse Over Time

One of the biggest mistakes homeowners make is waiting too long to address electrical warning signs.

Flickering or buzzing lights rarely “fix themselves.” In many cases, the condition gradually worsens until:

  • Breakers fail completely
  • Wiring overheats
  • Fixtures burn out
  • Appliances become damaged
  • Electrical fires occur

Small symptoms are often early warning indicators of larger electrical system failures.

Catching these issues early can:

  • Reduce repair costs
  • Prevent emergency outages
  • Improve safety
  • Protect appliances and electronics
  • Increase home value
  • Improve garage functionality

Modern Garage Upgrades Often Require Electrical Improvements

Today’s garages are evolving rapidly. Many Austin homeowners are converting garages into:

  • Fitness rooms
  • Workshops
  • Home offices
  • Entertainment spaces
  • EV charging stations
  • Hobby studios

These upgraded uses place significantly greater demand on the electrical system than traditional garage layouts.

A Trusted Residential Electrician In Austin, TX can help homeowners modernize their garage safely with:

  • LED lighting upgrades
  • Dedicated appliance circuits
  • EV charger installation
  • Subpanel additions
  • GFCI protection
  • Smart lighting controls
  • Surge protection
  • Additional outlets

These improvements not only increase convenience but also improve long-term electrical safety.

Don’t Ignore the Warning Signs

Buzzing, flickering, or dim garage lights are more than minor inconveniences. They are often warning signs that your electrical system needs professional attention.

Whether the issue involves failing connections, overloaded circuits, rodent-damaged wiring, improper grounding, or aging electrical components, delaying repairs can increase the risk of dangerous outcomes.

If your garage lighting has started behaving unusually, now is the time to schedule an inspection with a Trusted Residential Electrician In Austin, Texas. Professional diagnosis can uncover hidden problems early, protect your home, and restore safe, reliable lighting to one of the hardest-working spaces in your house.

For Austin, Texas homeowners, electrical safety is never something worth postponing.

read more
Home improvement

Essential Floating Dock Accessories for Homeowners

A floating dock already makes life near the water more useful. It gives you a place to board a boat, launch a kayak, swim, fish, or sit quietly at the end of the day. But a dock does not have to stay plain. With the right accessories, it can become safer, easier to use, and more comfortable for daily waterfront living.

The best upgrades are not always the biggest ones. Sometimes a simple ladder, better lighting, or a few protective bumpers can make the dock feel more complete. A good accessory should solve a real problem. It should make the dock easier to use, protect your boat, or help your family and guests feel safer around the water.

Below are some smart floating dock accessories worth considering.

Dock Ladders for Easier Water Access

A dock ladder is one of the most useful upgrades for a floating dock. If people swim from your dock, a ladder is not really optional. It gives swimmers a safer and easier way to get in and out of the water.

Retractable and flip-up dock ladders are popular because they can be lifted out of the water when not in use. That helps reduce algae growth, rust, and wear. It also keeps the ladder from staying wet all the time, which can help it last longer.

For deeper water, an angled ladder or extended ladder can make climbing much easier. Straight ladders work fine in some places, but they can feel harder to use, especially for kids, older adults, or anyone carrying gear. Wide steps and slip-resistant treads are also worth looking for because wet feet and smooth metal are not always a great mix.

A ladder may seem like a small thing, but it changes how usable your dock feels.

Dock Bumpers and Fenders for Better Protection

If you keep a boat near your floating dock, bumpers and fenders are very important. Boats move with waves, wind, and current. Even light movement can cause rubbing, dents, or scratches over time.

Dock bumpers act like cushions between the boat and the dock. They help absorb impact when the boat touches the dock during docking or while tied up. Corner bumpers are helpful too, especially in tight spaces where the boat may come in at an angle.

Fenders can also be attached to the boat for added protection. Together, bumpers and fenders help reduce damage and make docking less stressful. This is especially helpful if several people use the dock or if the water gets rough at times.

A floating dock moves more than a fixed dock, so protection matters. Small impacts can add up over time.

Solar Dock Lights for Safety and Visibility

Dock lighting is another smart upgrade. A dock can be hard to see at night, especially around steps, edges, cleats, or the gangway. Solar dock lights help make the area safer without needing complicated wiring.

Solar lights charge during the day and turn on at night. This makes them simple to install and easy to maintain. They can be placed along the dock edges, near the entrance, around seating areas, or close to boat tie-up points.

Motion-activated lights are useful for security and quick visibility. Soft pathway lights can make the dock easier to walk on after sunset. LED strip lights can give the dock a cleaner and more modern look, but they should still be installed in a way that does not create glare.

Good lighting is not only about appearance. It helps prevent trips, missed steps, and docking mistakes.

Dock Cleats and Tie-Up Systems

Cleats are small, but they do a big job. They help secure boats, kayaks, paddleboards, and other watercraft. Strong cleats make tying off easier and safer.

Flip-up cleats are a good choice for floating docks because they stay flat when not being used. This helps prevent people from tripping over them. Adjustable cleats can also be useful if different boat sizes use the same dock.

For areas with more waves or current, a better tie-up system may be needed. Mooring whips, dock lines, and shock-absorbing systems help reduce pulling and sudden movement. This can protect both the boat and the dock hardware.

The right tie-up system depends on your water conditions and how you use the dock. A calm pond and a busy waterfront do not need the same setup.

Storage Boxes for Gear and Supplies

Waterfront gear can pile up fast. Ropes, life jackets, towels, fishing tools, paddles, cleaning supplies, and boat items all need a place to go. A waterproof storage box keeps these items organized and protected.

Storage boxes are especially helpful for families. Instead of carrying everything back and forth from the house, you can keep common items close to the dock. Look for storage that is weather-resistant, sturdy, and easy to open.

Some storage benches can do two jobs at once. They provide seating and space for gear. That is useful if your dock is smaller and you want to save room.

A clean dock is also a safer dock. Loose ropes, tools, and life jackets can become tripping hazards if they are left scattered around.

Comfortable Seating and Shade

A floating dock is not only for boats. Many people use it as a place to relax. Adding seating can turn the dock into a more enjoyable outdoor space.

Built-in benches, folding chairs, dock stools, or storage seating can make the area more inviting. If the dock gets a lot of sun, shade is worth considering too. A small canopy, umbrella, or removable shade structure can make the dock more comfortable during hot days.

Comfort upgrades do not need to be fancy. Even a simple bench and a shaded spot can make the dock feel like a place where people want to spend time.

Kayak, Paddleboard, and PWC Launches

If you use kayaks, paddleboards, or personal watercraft, a launch system can make a big difference. These accessories help you get in and out of the water with less effort.

A kayak launch gives you a stable place to sit while entering or exiting the kayak. Paddleboard racks help keep boards off the dock surface and out of the way. PWC ports make it easier to store small watercraft without tying them directly to the dock.

These upgrades are helpful because they reduce clutter and make water activities smoother.

Final Thoughts

The right floating dock accessories can make your dock safer, cleaner, and more enjoyable. Some upgrades protect your boat. Others improve comfort, storage, lighting, or water access. The best choices depend on how you use your dock every day.

Start with the basics first. Think about safety, access, protection, and storage. After that, add comfort features that fit your lifestyle. With thoughtful upgrades, a floating dock can become more than a place to step onto the water. It can become one of the most useful and relaxing parts of your waterfront property.

This post was written by a professional at Supreme Marine Floating Docks. https://supremefloatingdocks.com/ is dedicated to providing top-quality floating docks and marine accessories that combine durability, innovation, and superior performance. While we are a new brand, our team brings over 50 years of combined industry experience, making us a trusted name in the marine world. We are passionate about designing and delivering products that meet the highest standards, ensuring reliability and longevity in all marine environments. Whether for residential, commercial, or recreational use, our docks are crafted with precision and care, setting a new benchmark in the industry. At Supreme Marine, we don’t just build docks-we create lasting solutions.

read more
Home improvement

How Quality Glass in Pocatello Can Keep Your Home Comfortable and Stylish

Windows and glass features can add a warm, welcoming vibe to a home. Quality glass provides a clear view of the outdoors. It also influences how comfortable, energy-efficient, and beautiful your home feels every day.

If you live in Pocatello, you know how important it is to have a home that can handle everything from freezing winters to warm summers. That is where investing in Nu-Vu Glass solutions can make a difference. The company has been known for its quality glass products and dedication to the community.

Your Home’s Comfort Starts with the Right Glass

Most homeowners do not think much about their windows until a draft sneaks in, the heating bill spikes, or condensation starts forming on the glass. These are signs that your current windows are not doing their job properly.

Quality glass windows can create a strong barrier between your home and the outside elements. Here is what that means for your everyday comfort:

  • Better temperature control. High-performance glass keeps warm air inside during Pocatello’s cold winters and blocks excess heat during summer. Thus, your home stays at a comfortable temperature without overworking your HVAC system.
  • Lower energy bills. Your heating and cooling system does not have to work as hard when your windows are properly insulated. This translates to noticeable savings on your monthly utility bills throughout the year.
  • Reduced drafts and cold spots. Nobody wants to sit near a window in January and feel a chill. Quality glass eliminates these uncomfortable cold spots that can make rooms feel uninhabitable during winter.

Noise Reduction is a Benefit You Will Appreciate

Pocatello is a growing city, and with this growth comes more traffic, more noise, and more daily hustle. Quality glass windows act as a sound buffer between your home and the outside world. Multi-pane windows with proper sealing can reduce the amount of outdoor noise that filters into your living space.

Style That Makes a Statement

Quality glass has a major impact on how your home looks inside and out. Upgrading your windows and glass features can refresh your home’s appearance without a full renovation. Here are some popular glass upgrades that Pocatello homeowners choose to boost their home’s style:

  • Frameless glass shower doors. These create a sleek, open, and modern bathroom aesthetic that can instantly make the space feel more luxurious.
  • Custom glass partitions. These are perfect for open-concept spaces and glass partitions. They add a sophisticated touch while maintaining an airy, connected feel throughout your home.
  • Decorative glass windows. Frosted, textured, or tinted glass options add personality and privacy to any room without sacrificing natural light.
  • Sliding glass doors. These doors can connect your indoor and outdoor spaces, making your home feel larger and more inviting.

Natural Light Can Change Everything

Bright, sunlit rooms feel more open, more inviting, and more cheerful. Studies have shown that natural light improves mood, productivity, and overall well-being.

Strategically placed glass windows and doors allow sunlight to flow through your home throughout the day. They reduce your dependence on artificial lighting and create a vibrant atmosphere that your family will appreciate.

Glass That Adds Value to Your Pocatello Home

Homes with modern, energy-efficient windows and stylish glass features can attract more buyers and command higher prices on the market. It is an investment that pays off whether you plan to stay in your home for decades or sell it in the near future.

Working with the Right Glass Professional

Choosing quality glass products is only half of the equation. The other half is making sure they are installed by experienced professionals who know what they are doing. A poorly installed window or glass feature will not perform the way it should. Working with a trusted local glass company like Nu-Vu gives you the confidence that every installation is done with care and attention to detail.

read more
Home improvement

Why Temporary Surface Protection Film is Essential for Home Renovations

Home renovation projects bring excitement, transformation, and increased property value-but they also introduce significant risks to existing surfaces.

From dust and debris to paint spills and tool impacts, even a small project can cause costly and irreversible damage.

This is where temporary surface protection film becomes not just useful, but essential.

Protecting Surfaces from Physical Damage

During renovations, high foot traffic, heavy equipment movement, and material handling can easily scratch, dent, or chip floors, countertops, and walls. Hardwood floors can be gouged, tiles can crack, and delicate surfaces like marble or glass can suffer permanent marks.

Temporary surface protection film acts as a durable barrier between these vulnerable surfaces and construction activities. Designed with strong yet removable adhesives, these films stay securely in place throughout the project, absorbing impacts and preventing direct contact with harmful elements. Once the work is complete, the film can be removed easily without residue or harm to the original surface.

Preventing Paint, Dust, and Chemical Contamination

Renovation work often generates large amounts of dust, paint splatters, adhesives, and other contaminants. These substances can settle on surfaces and be difficult to remove, especially from porous or textured materials.

Protection films create a sealed layer that blocks dust infiltration and prevents spills from reaching the surface beneath. It becomes even more essential when dealing with high-end surfaces like natural stone, stainless steel, and finished wood. By keeping surfaces clean during the process, these films significantly reduce the need for intensive post-construction cleaning.

Reducing Cleaning Time and Costs

Post-renovation cleanup can be both time-consuming and expensive. Without proper protection, homeowners or contractors may need to invest in professional cleaning services, specialized chemicals, or even repair damaged areas.

Using temporary surface protection film simplifies cleanup dramatically. Rather than dealing with stubborn stains or debris, workers can simply peel away the film to reveal a clean, intact surface. This not only saves time but also reduces labor costs and minimizes the risk of accidental damage during cleaning.

Enhancing Safety on the Job Site

Safety is a critical concern during any renovation project. Slippery floors, scattered debris, and unstable surfaces can increase the risk of accidents for both workers and occupants.

Many protection films are designed with anti-slip properties, providing better traction and reducing the likelihood of slips and falls. Additionally, by containing dust and debris, they help maintain a cleaner and more organized workspace, further contributing to a safer working environment.

Preserving Aesthetic Value and Property Investment

Renovations are often undertaken to improve the appearance and value of a home. Ironically, without proper protection, the renovation process itself can undermine these goals by damaging existing finishes.

Temporary surface protection films help maintain surfaces in flawless condition throughout the entire project. Whether it’s newly installed flooring or existing fixtures that need to be preserved, these films help maintain the overall aesthetic integrity of the space. This is especially important in high-end renovations, where even minor imperfections can affect the final result.

Versatility Across Multiple Applications

One of the key advantages of temporary surface protection film is its versatility. It is suitable for a variety of surfaces, including hardwood floors, tiles, carpets, glass, countertops, cabinets, and appliances.

Different types of films are available to suit specific needs-such as heavy-duty floor protection, blue glass protective films, or breathable films for moisture-sensitive materials. This flexibility makes it an indispensable solution for projects of all sizes, from small home upgrades to large-scale remodeling.

A Small Investment with Big Returns

Compared to the potential costs of repairs, replacements, and extended cleaning, temporary surface protection film is a highly cost-effective solution. It requires minimal installation effort but delivers substantial benefits in terms of damage prevention, efficiency, and peace of mind.

read more
1 2 3 20
Page 1 of 20