close

July 2026

Painting

Elevate Your Space with Feature Wall Design and Painting

Transforming a room often starts with a single, bold decision. A thoughtfully chosen accent wall can become the centrepiece of your home, instantly altering its atmosphere and style. Professional interior design experts, such as those at Criss Design, champion this approach for modern interiors.

As noted by industry voices in March 2025, this concept has seen a significant resurgence. It offers a powerful method to inject personality into your living space without a complete overhaul. The key lies in selecting the right treatment for your specific room.

Whether your taste leans towards subtle elegance or vibrant drama, the choice of colour and texture is paramount. These elements work together to create a cohesive and stylish environment. Modern trends actively encourage homeowners to experiment, ensuring the final result reflects their unique aesthetic.

By integrating professional paint techniques and strategic planning, you can elevate a simple wall into a stunning focal point. This single element has the power to define the character of your entire living area, making it feel truly personalised.

Key Takeaways

  • A well-executed feature wall can completely redefine the atmosphere and style of a room.
  • This interior design technique is currently favoured by experts for creating a modern home.
  • Choosing the correct colour and texture is essential for achieving a cohesive look.
  • Your personal aesthetic should be the primary guide for any decorative project.
  • Professional guidance, like that from Criss Design, can help transform your vision into reality.
  • An accent wall serves as a focal point that can define your entire living space.
  • Experimenting with paint techniques allows for a unique and personalised result.

Getting Started with Feature Walls

The journey to a stunning accent wall involves both creative concept and careful execution. According to Cindy Smith of Smith Interiors in Charlotte, a successful project begins with a liberating principle.

There are no hard rules when planning your feature wall.

Cindy Smith, Smith Interiors

This philosophy encourages homeowners to focus on their personal vision first. Developing a clear concept is the essential initial step.

Concept to Execution

Start by assessing the existing architecture of your space. Your chosen focal point should enhance the room, not overwhelm the existing decor.

Injecting your own character through colour or texture makes the result feel intentional. This process turns abstract wall ideas into a tangible plan for your home.

Budget and Planning Considerations

A detailed budget allows for high-quality materials without compromising the final look. Strategic financial planning is crucial for a polished outcome.

Consider the timeline and how the work will affect your living area. Proper preparation minimises disruption and ensures a smooth transformation.

Planning Phase Key Considerations Estimated Impact
Concept Development Define personal style & desired mood Sets the overall creative direction
Material Selection Balance quality, cost, and aesthetics Directly affects durability and finish
Timeline Coordination Align with room usage and household routine Minimises daily disruption

Feature Wall Design and Decorative Painting Ideas for Your Home

Selecting the right treatment for a specific area involves considering both aesthetic impact and practical light interaction. A classic William Morris print, with its large white blooms and tiny orange flowers, can establish a sophisticated feature in a formal dining room.

Exploring various feature wall ideas allows for a balance between traditional motifs and a modern, fresh style in your home. The interplay of natural light with your chosen colours is crucial for crafting a welcoming atmosphere.

Many find a well-placed focal point in the central living room offers the perfect backdrop. It enhances both social gatherings and quiet moments, effectively defining the space.

Professionals consistently advise testing paint samples directly on your walls. This simple step ensures the final hue complements your existing furniture, creating a cohesive and intentional look for the room.

Exploring Impactful Accent Techniques

Beyond mere colour application, strategic techniques impart dimension and character to any space. These methods transform flat surfaces into engaging focal points.

Expert Cody Brown of Bridges Brown Interiors advocates using plaster on a fireplace surround. This treatment softens the vertical plane to add depth with tactile quality.

Bold Colour Blocking and Striped Styles

Colour blocking proves highly effective for creating dramatic contrast. Bold shades applied in geometric forms make a powerful statement.

Incorporating a vertical stripe visually alters room proportions. This simple trick makes compact areas feel taller, more expansive.

A painted arch behind a bed serves as a stylish faux headboard. It defines the sleeping zone without major investment.

Precision in application separates amateur attempts from professional finishes.

Painting Specialist

Using professional masking tape ensures crisp, clean lines for any design. This attention to detail delivers a polished result.

Technique Ideal Application Primary Effect
Colour Blocking Living areas, bedrooms Creates contrast, adds depth
Vertical Stripes Rooms with low ceilings Elongates space visually
Plaster Finish Fireplace surrounds Softens texture, adds tactile quality
Painted Arch Bedroom behind bed Defines sleeping area as headboard

Each method offers a distinct way to personalise your home. The right choice depends on your existing decor, desired atmosphere.

Innovative Wall Painting Techniques

Innovative methods for applying colour transform a plain surface into a personalised canvas. These approaches move beyond simple coverage, offering ways to craft unique visual interest.

Artist Annie Sloan champions a particularly creative concept. She recommends using paint to emulate furniture shapes in two dimensions on your wall.

This is a fantastic way to make an impactful statement within a room.

Annie Sloan, Artist

This technique allows you to wall create a custom look that is entirely unique to your home. It represents a shift from standard paint wallpaper applications.

For a smooth, professional surface, consider a matte finish. It expertly hides imperfections on your walls.

Experimenting with different brush strokes can introduce a textured effect. This adds depth and character to any room.

Professional painters rely on high-quality rollers. They ensure an even coat, which is crucial for a flawless feature wall.

Technique Best Tool Key Benefit
2D Furniture Shapes Artist Brushes Creates a personalised, artistic statement
Textured Brushwork Varied Brush Types Adds visual depth and tactile interest
Flawless Matte Finish High-Density Roller Hides flaws for a professional look

DIY Tips for Achieving a Statement Wall

A hand-crafted mural can instantly become the soul of a space, reflecting the homeowner’s unique character. Bari J. Ackerman, founder of Bari J. Designs, exemplified this by hand-painting a floral mural freehand in a Scottsdale guest bedroom. This project illustrates how a personalised feature wall is a great way to inject personality into a room.

Simple Paint Tricks and Mural Methods

DIY projects empower you to transform your walls with accessible paint tricks. Techniques like creating a soft cloud effect or a crisp geometric mural design require minimal specialist equipment.

Achieving a striking statement wall is a fantastic method to express your creativity. It often proves more budget-friendly than commissioning a professional painter for your home.

Proper planning is essential for a polished result. Ensure you have the correct tools, such as high-quality brushes and painter’s tape, to achieve clean lines and a professional finish.

Taking time to prepare the wall surface thoroughly is crucial. This foundational step ensures your paint or mural adheres properly and endures for years, making the space truly your own.

Technique Required Tools Key Benefit
Freehand Floral Mural Artist brushes, acrylic paints Creates a unique, artistic focal point
Cloud Effect Sea sponge, blending brush Adds soft, atmospheric texture
Geometric Design Painter’s tape, level, small roller Delivers modern, graphic impact

Creative Wallpaper and Mural Inspirations

Sophie Robinson’s collaboration with Harlequin introduces a fabulous handpainted abstract wallpaper. This pattern serves as an instant feature wall for any room, offering artistic flair without a brush.

Trend Alert: Mural Wallpapers and Botanical Prints

Mural wallpaper designs are surging in popularity. They excel at bringing the outdoors in, with lush botanical prints creating a calm, stylish atmosphere in your home.

Selecting the right treatment is a transformative experience. The ideal choice complements your existing furniture and decor, harmonising the entire space.

Many contemporary options are designed for straightforward installation. This makes updating your walls a quick, practical project.

Consider deep green or blue botanical motifs for a bedroom. They add a layer of luxury, turning a plain wall into a sophisticated retreat.

Mixing Textures with Wall Panelling

Cynthia Masters of Panageries in Greenville demonstrated how wood can transform a plain space into a warm, inviting area. She used warm slat panelling to add depth and interest to a simple box room.

Wall panelling is an excellent way to introduce interesting architectural detail to a contemporary home. It provides character and charm where it might otherwise be absent.

Wood Feature Walls and Panelling Options

Mixing textures by combining wood panelling with soft furnishings creates a balanced and inviting atmosphere. This approach works effectively in any living space or bedroom.

From shaker style to shiplap, there are numerous wall panelling options available. Each suits different design preferences and home aesthetics.

Installing wood panelling on a feature wall can significantly increase a property’s value and appeal. It adds a touch of elegance that is both timeless and sophisticated.

The tactile quality of wood brings an immediate sense of sophistication. It turns flat walls into a dynamic focal point.

Integrating Traditional and Contemporary Styles

A clever fusion of old and new can instil a sense of heritage into even the most contemporary home. Kelsey Leigh McGregor of Kelsey Leigh Design in Edmond demonstrated this by incorporating a stone accent wall. This single element made a new property feel older and more established.

Integrating traditional materials like stone or wood with modern interior design creates a unique, timeless look. This approach bridges different eras, ensuring your space feels both current and deeply personal.

A well-conceived feature wall acts as the perfect mediator between styles. When mixing, a cohesive colour palette is essential. It ensures the treatment feels like a natural part of the room.

Professional designers often use contrast to highlight the beauty of both traditional and contemporary pieces. This technique results in a single, well-curated living area. The final look is sophisticated, balanced, and entirely unique to your home.

Design Ideas for Living Rooms and Bedrooms

The most personal rooms in a home offer prime opportunities for impactful decorative statements. These central areas are where daily life unfolds, making them ideal for introducing a strong visual focus.

Focal Points in Primary Spaces

Kevin Francis O’Gara of Kevin Francis Design in Atlanta used moulding to craft a cocoon effect around the bed in a primary bedroom. This technique turns the sleeping room into a serene sanctuary, with the architectural detail framing the wall behind.

In the living room, a striking treatment can highlight an existing fireplace. This draws the eye to a natural feature, creating a warm hub for the space.

For sleeping quarters, consider a gallery wall of personal art or a faux headboard painted directly onto the walls. These elements add depth and personality. Rooms with high ceilings are perfect for extending a feature wall design upward, achieving a dramatic, immersive effect.

When planning multiple rooms, ensure your choices maintain a cohesive flow throughout the home. A consistent colour or material theme links the areas professionally.

Enhancing Space in Hallways and Kitchens

Transitional areas like hallways and kitchens hold untapped potential for impactful interior statements. These spaces, often seen as mere thoroughfares, can become defining elements of your home’s character.

Lauren Robbins of Lauren Robbins Interiors in Augusta utilised whimsical hot air balloon paper to create a focal point in an entry. This approach instantly transforms a generic hallway into a welcoming, personality-filled space.

In the kitchen, an accent wall serves a dual purpose. Choosing durable materials like ceramic tiles or washable wallpaper ensures style meets practicality in a busy room.

Hallways are frequently overlooked in design schemes. Adding a single treated wall makes these transition rooms feel like an intentional, curated part of your home.

For areas with high ceilings, vertical patterns on your wall draw the eye upward, emphasising the architecture. A thoughtful colour palette can also make compact rooms appear more spacious and inviting.

Utilising Modern Materials in Feature Walls

Incorporating reflective surfaces or textured tiles introduces a dynamic element to any interior scheme. These contemporary choices move beyond standard finishes, offering both visual intrigue and practical benefits.

Meg Lonergan of Meg Lonergan Interiors in Houston demonstrated this by layering a small, framed antique mirror atop a larger one. This mirrored treatment adds significant visual interest and makes a compact area feel more open and functional.

Materials like antique mirror glass or handcrafted zellige tiles add a distinct layer of sophistication. Similarly, a carefully curated gallery wall of modern art creates a stunning focal point in a living room, showcasing personal style.

Such options often provide interesting architectural detail, transforming a plain surface into a high-end statement. When selecting materials, considering their durability and ease of maintenance ensures the beauty of your project lasts for years.

Material Primary Effect Best For
Antique Mirror Amplifies light and creates depth Small spaces needing visual expansion
Zellige Tile Adds textured, luminous colour variation Kitchen backsplashes or bathroom accents
Gallery Arrangement Showcases personal taste as a curated focal point Living areas or hallways

Sustainability and Innovative Techniques in Wall Design

Modern interior aesthetics are increasingly shaped by a commitment to both visual impact and environmental responsibility. This shift influences how focal points are created within the home.

Dara Beitler of Dara Beitler Interiors in Potomac demonstrated this balance. She used Sherwin-Williams Tricorn Black to add depth and symmetry to a dining room feature wall.

Choosing eco-friendly, low-VOC paints is now a crucial consideration. These products improve indoor air quality while delivering rich colour.

Innovative techniques further this sustainable ethos. Using reclaimed wood or recycled tiles crafts a unique statement that is also environmentally conscious.

A well-planned focal point in the kitchen or living room can promote a minimalist aesthetic. It reduces the need for excessive decor, simplifying the space.

Professionals constantly explore new methods to maintain visual drama sustainably. The goal is a stunning feature without compromise.

Sustainable Material Primary Benefit Ideal Application
Reclaimed Wood Panelling Adds warmth and unique history; reduces waste. Living area or bedroom accent walls.
Recycled Glass Tiles Provides luminous, textured colour; uses post-consumer materials. Kitchen backsplash or bathroom wall.
Low-VOC & Eco Paints Minimises harmful emissions; wide colour range available. Any room, especially bedrooms and the home office.

Using Criss Design for a Unique Touch

Achieving a truly personalised focal point often requires expert guidance and a tailored approach. Criss Design specialises in bespoke solutions that turn any room into a reflection of individual taste.

Their team provides expert advice on techniques like colour blocking and stripe patterns. These methods add depth and visual interest to your surfaces in a unique way.

Collaborating with them allows you to create a custom feature wall that becomes the one true centrepiece of your room. Their professional methodology ensures every creation project is executed with precision.

This attention to detail results in a high-quality finish for your home. They transform a plain wall one step at a time into a stunning piece of art.

Whether you prefer bold stripes or subtle colour blocking, their approach guarantees your space mirrors your personal style perfectly. Focusing on a single surface can yield dramatic results.

Artistic Perspectives with Criss

An artistic perspective transforms the act of decorating a room into a process of curation. Criss brings this outlook to every project, helping clients see their walls not as mere surfaces but as blank canvases for personal expression.

This approach is perfectly realised in the creation of a gallery wall. It becomes a powerful method to showcase a cherished collection of art and personal treasures within your home. The expertise lies in balancing scale, colour, and negative space to craft a cohesive and intentional display.

Every wall in your home has the potential to be a focal point of artistry. By applying these principles, a single treated wall can evolve into a unique reflection of your vision. It ensures the final result is not just a feature, but a meaningful narrative within your living environment.

Tips for Customising Your Accent Walls

The final layer of personalisation for your accent wall lies in the thoughtful details and finishing touches. These elements elevate a good concept into a great one, ensuring the result feels uniquely yours.

Personalisation Through DIY Approaches

Yoselin Castro of Mackenzie Collier Interiors in Phoenix highlights a clever tactic. Varying your picture-hanging techniques is a great way to make a gallery wall pop with added personality.

This DIY spirit extends to other methods. Applying wall panelling or installing a mural wallpaper can transform a bland hallway or other rooms. It injects character without a major renovation.

Whether you opt for bold colour blocking or paint a faux headboard, the goal is the same. Personalising your walls is the best method to make your home feel truly yours.

Choosing the Right Finishing Touches

Criss recommends a focused approach. Consider lighting and other accents, like picture lights, to highlight your feature wall wall one at a time.

This careful curation ensures each element shines. Your wall ideas must be as practical as they are beautiful. They need to stand the test of time in a busy living space.

Finishing Element Primary Purpose Professional Tip
Picture Lighting To highlight artwork and create focal points Use adjustable LED spots to control glare and ambience
Varied Hanging Hardware To add visual depth and interest to a display Mix floating shelves with different hook styles for a layered look
Durable Materials To ensure longevity in high-traffic areas Choose washable paints or scrubbable wallpapers for halls and kitchens
Cohesive Colour Palette To unify the accent wall with the rest of the room Pull a secondary colour from the wall for cushions or accessories

Conclusion

Ultimately, a well-executed statement surface serves as the definitive expression of your home’s character. The process of elevating your residence with professional feature wall ideas is immensely rewarding. It significantly enhances the overall interior design of your living space.

By carefully selecting materials and techniques, you create stunning feature walls. These become the heart of your living area, offering a focal point that unifies the decor. The best result reflects your personal style while complementing the existing architecture.

Whether you choose paint, wallpaper, or panelling, your surfaces possess the power to transform any room. This transformation affects the atmosphere, making it more inviting or dynamic.

We hope these insights inspire your own design project. Create a space you are proud to call home. Begin with a single, bold vision and watch your environment evolve.

FAQ

How do I choose the best wall in a room for an accent?

The ideal candidate is often the first wall you see upon entering a space, such as behind a sofa or bed. Many designers select the wall with interesting architectural details, like a fireplace, or the one that naturally serves as a focal point. In a bedroom, the area behind the headboard is a classic choice for adding personality.

What are some budget-friendly ways to create a statement wall?

Using paint is one of the most cost-effective methods. Techniques like colour blocking, painting a wide stripe, or a simple geometric mural can be achieved with painter’s tape and a little patience. Another affordable option is to apply a single roll of a bold, high-impact wallpaper to create a focal point without the expense of covering an entire room.

Can I use a bold accent wall in a small space like a hallway?

Absolutely. A strong colour or pattern in a narrow hallway can add tremendous depth and character, making the space feel intentional and dynamic. Darker hues can recede, making walls feel further away, while a vertical stripe can draw the eye upwards, enhancing the perception of height.

What is the difference between an accent wall and a gallery wall?

An accent wall typically uses a uniform material like paint, wallpaper, or panelling to create a singular, cohesive statement. A gallery wall is a curated collection of art, photographs, and objects arranged on a wall. While a gallery wall can be the focal point of a room, it is a display method rather than a treatment of the wall surface itself.

Are mural wallpapers difficult to install?

Modern mural wallpapers, especially peel-and-stick varieties from brands like Graham & Brown or Photowall, are designed for easier DIY installation. They often come in manageable panels. The key is careful preparation: ensuring the wall is clean, smooth, and properly measured. Following the manufacturer’s instructions precisely yields the best professional look.

How can I add texture to my living room without using wallpaper?

Wall panelling is an excellent solution. Options like shiplap, beadboard, or modern slatted wood can introduce rich texture and shadow lines. Painting the panelling in a contrasting colour to the other walls amplifies the effect. Alternatively, paint techniques such as lime washing or using a textured roller can create a tactile, sophisticated finish.

What should I consider when planning a DIY painted mural?

Start with a clear design sketch and use a projector or grid method to scale it accurately onto your wall. Use high-quality painter’s tape for sharp edges and invest in good brushes for detail work. Test your colours on a large sample area first, as light can change how they appear. Patience and allowing adequate drying time between layers are crucial for a polished result.
read more
Home improvement

How PU Grouting Seals Leaks in Concrete Slabs

Basement car parks in Singapore condominiums often develop a particular kind of problem: water tracking along a construction joint or through a hairline crack in the slab, appearing as a damp line or an active drip whenever the water table rises after sustained rain. Surface coatings cannot fix this because the water is moving through the concrete itself under pressure, not sitting on top of it. This is exactly the situation polyurethane grouting was developed to solve, and it explains why the technique has become a standard tool for basements, lift pits, and other below-grade structures across the island.

What Polyurethane Grouting Actually Is

PU grouting involves injecting a liquid polyurethane resin directly into a crack, joint, or void within a concrete structure, where it reacts with moisture or a separate catalyst and expands to fill the gap from the inside out. Unlike a surface-applied membrane, which blocks water from a face of the structure, the injected resin becomes part of the crack itself, forming a flexible seal that can accommodate a small amount of ongoing movement without breaking the bond. This makes it particularly suited to structures that continue to shift slightly over time, such as basement walls subject to changing groundwater pressure or slabs that experience minor thermal expansion and contraction.

Why Active Leaks Need a Different Approach

A crack that is actively weeping or dripping water cannot simply be patched from the surface, because standard cementitious repair materials need a reasonably dry substrate to bond properly, and any coating applied over active water pressure tends to blister or get pushed off before it cures. PU grouting sidesteps this problem entirely, since the resin is designed to react with the water present in the crack rather than being defeated by it. In basement conditions where pumping out the water long enough for a dry repair simply isn’t practical, injection becomes the only realistic method available.

Locating and Drilling Injection Ports

Before any resin goes in, the contractor maps the full path of the crack or joint, since water entering at one visible point often travels some distance through the concrete before it appears on the interior face. Injection ports, small packers set into holes drilled at an angle intersecting the crack, get installed at intervals along this path, angled to meet the defect roughly at its mid-depth through the slab or wall rather than just at the surface. Spacing and depth here are judgment calls that depend on the width of the crack and the thickness of the concrete section, and getting this step wrong is one of the more common reasons a first injection attempt does not fully stop a leak.

Injecting the Resin Under Controlled Pressure

Resin gets pumped through each port using a specialised injection pump, working from the lowest point of the crack upward so the material fills progressively rather than bypassing sections. Pressure needs to be high enough to force the resin through the full width and depth of the crack network but controlled enough not to force material out through an unintended path, which is part of why this work benefits from contractors with hands-on injection experience rather than a general handyman with a caulking gun. A detailed look at how this process gets planned and executed on real Singapore projects is available in this overview of polyurethane grouting strategies for waterproofing, which covers material selection and site sequencing in more depth.

Hydrophilic Versus Hydrophobic Resin Formulations

Not all polyurethane grouts behave the same way once injected. Hydrophilic formulations absorb water as part of their curing reaction and expand accordingly, making them well suited to sealing construction joints that see continuous low-level moisture. Hydrophobic formulations, by contrast, react with water to form a rigid, closed-cell foam that repels further moisture, which tends to suit fast-moving active leaks where stopping the flow quickly matters more than long-term flexibility. Choosing between the two, or combining both in a single crack, depends on how the water is behaving at that specific location rather than a fixed rule that applies to every job.

Checking the Seal Before Calling the Job Done

Once the resin has fully cured, usually within a matter of hours depending on the formulation and site temperature, the injection ports get cut back flush and patched over with a cementitious mortar to leave a clean finish. A proper job does not end there, though; the area needs to be observed through at least one further wet cycle, whether that means the next heavy rainstorm for a basement wall or a deliberate water test for a slab, to confirm the leak has actually stopped rather than simply slowed. Contractors who skip this verification step sometimes hand over a repair that looks finished but is only partially effective, leaving the homeowner or building management to discover the gap the next time water pressure builds up.

Where This Technique Fits in Singapore Buildings

PU grouting shows up most often in basement car parks, lift pits, retaining walls, and construction joints in structures built below the water table, all common features in condominium developments with multiple basement levels. It also appears in landed home settings where a swimming pool shell or a below-ground rainwater tank develops a leak that surface waterproofing cannot reach. Because the technique addresses the crack directly rather than covering the surrounding area, it often costs less and disrupts a building far less than an alternative that would require excavating from the outside to reach the same defect.

read more
Kitchen

Modern White Kitchens: Bright, Elegant and Built for Everyday Living

Modern white kitchens have long been associated with clean lines, bright spaces and timeless appeal. Yet today’s white kitchen designs are far more varied than the plain, clinical schemes people often imagine. With the right combination of materials, lighting, texture and layout, a white kitchen can feel warm, layered, contemporary and highly personal.

For many homeowners, white provides the perfect starting point. It reflects natural light, works with almost every style of property and creates a calm foundation that can be dressed up or pared back depending on the desired look. Whether you prefer a sleek handleless kitchen, a soft matt finish, a modern shaker style or a white and wood combination, the beauty of white is its flexibility.

If you are gathering ideas for modern white kitchens or exploring broader inspiration for light kitchens, it is worth thinking beyond colour alone. The most successful white kitchens are carefully planned around contrast, proportion, practicality and atmosphere.

Why White Kitchens Remain So Popular
White kitchens continue to be a strong choice because they offer both visual freshness and long-term versatility. Unlike some bolder colours, white is unlikely to feel tied to a short-lived trend. It can be adapted over time through new wall colours, lighting, stools, accessories, artwork or flooring, without needing to replace the main kitchen furniture.

White also works beautifully in a wide range of homes. In a modern extension, it can enhance rooflights, large glazing and open-plan architecture. In a period property, it can bring a sense of lightness while allowing original features to stand out. In smaller rooms, it can help the space feel more open and less crowded.

However, a modern white kitchen should not feel flat. The key is to introduce depth through different surfaces and finishes. This might include a warm white cabinet door, a stone-effect worktop, a textured splashback, wood shelving, brushed brass handles or dark accents for definition. These details prevent the design from feeling too stark.

Choosing the Right Shade of White
White is not a single colour. There are bright whites, soft whites, warm whites, cool whites, chalky tones, ivory shades and subtle off-whites. The right choice will depend on the room, the amount of natural light and the materials used elsewhere in the scheme.

A bright white kitchen can look crisp and architectural, especially in a contemporary space with plenty of daylight. However, in a north-facing room or a home with limited natural light, a brilliant white may feel too cold. In these situations, a softer white, porcelain tone or warm neutral can be more comfortable to live with.

Warm whites pair particularly well with wood, stone, ceramic finishes and brushed metal. Cooler whites can suit minimalist spaces, monochrome schemes and modern handleless cabinetry. Before committing, it is always worth viewing samples in the room itself, as the same shade can look very different depending on light, flooring and wall colour.

Matt, Gloss or Textured White?
The finish of a white kitchen has a major impact on the final result. Gloss white kitchens were once extremely popular because they reflected light and created a polished, modern look. They can still work well in the right setting, especially where a sleek and reflective finish is desired.

Matt white kitchens have become increasingly popular for homeowners who want a softer, more understated appearance. A matt finish reduces glare and often feels more refined. It works well with handleless doors, slab cabinets, shaker styles and contemporary open-plan layouts.

Textured white finishes can add even more interest. Subtle grain effects, ceramic-inspired surfaces, fluted details or lightly structured doors can give the design depth while keeping the overall look calm. This is especially useful in larger kitchens, where plain white cabinetry may otherwise feel too simple.

Pairing White with Wood
White and wood is one of the most effective combinations for a modern kitchen. White keeps the space bright and open, while wood adds warmth, grain and natural texture. Together, they create a balanced look that feels clean but not cold.

Wood can be introduced in several ways. A white kitchen with a wood island can create a strong focal point. Wood wall units or shelving can soften a run of tall white cabinetry. A wood breakfast bar can make an island feel more inviting. Even smaller touches, such as open shelving, display recesses or internal cabinet detailing, can help the design feel more layered.

Light oak is ideal for a relaxed, Scandinavian-inspired look, while walnut brings a richer and more luxurious feel. Mid-tone wood can work particularly well in family kitchens because it adds warmth without overpowering the space.

Adding Contrast with Dark Accents
A modern white kitchen often benefits from contrast. Without it, the room can lack structure. Dark accents help define the design and give the eye somewhere to rest.

Black, charcoal, graphite or bronze can be introduced through handles, taps, pendant lights, appliances, bar stools, framed glass cabinets or shelving. These details can make a white kitchen feel sharper and more contemporary without making the room dark.

For a softer approach, consider warm metallics such as brushed brass, aged bronze or champagne-toned finishes. These work especially well with warm white cabinetry, pale stone worktops and natural wood details. They add elegance without creating too much contrast.

Worktops and Splashbacks for White Kitchens
The worktop is one of the most important choices in a white kitchen. It has to be practical, but it also plays a major role in the overall appearance of the room.

A pale stone-effect worktop can create a seamless, elegant look. Marble-inspired surfaces with subtle veining can add sophistication, while concrete-effect finishes create a more industrial feel. For a stronger contrast, darker worktops can give the kitchen definition and make white cabinetry stand out.

Splashbacks also offer an opportunity to add character. A white kitchen can be paired with handmade-look tiles, glass, stone, porcelain, ceramic slabs or a full-height worktop splashback. Texture is often more effective than strong colour, especially if the aim is to keep the space calm and timeless.

Planning the Layout Carefully
A white kitchen may look simple, but the layout still needs careful thought. The best kitchens are designed around how the space is used every day. Cooking, preparation, storage, cleaning and seating all need to be considered.

In an open-plan room, white cabinetry can help the kitchen blend naturally with the surrounding living space. Tall white units can create a clean architectural backdrop, while an island can provide contrast, storage and a social gathering point.

In a smaller kitchen, white can make the room feel more spacious, but storage must be planned intelligently. Deep drawers, tall larders, integrated bins, corner solutions and appliance garages can all help keep worktops clear. A clutter-free white kitchen will always feel more elegant and functional.

Lighting Makes All the Difference
Lighting is particularly important in a white kitchen because it affects how the colour appears. Poor lighting can make white cabinetry feel dull or cold, while well-planned lighting can bring warmth, depth and atmosphere.

Natural light should be considered first. Large windows, rooflights and glazed doors can make a white kitchen feel bright and uplifting throughout the day. Artificial lighting should then be layered to support different tasks and moods.

Task lighting is needed for preparation areas, cooking zones and sinks. Ambient lighting helps soften the room in the evening. Feature lighting, such as pendants over an island or discreet lighting inside display cabinets, can add personality and warmth.

Keeping a White Kitchen Practical
Some homeowners worry that a white kitchen may be difficult to maintain, but this depends on the materials chosen. High-quality cabinet finishes, durable worktops and easy-clean splashbacks can make a white kitchen perfectly practical for family life.

Matt finishes may show marks differently from gloss finishes, so it is worth comparing samples and asking about maintenance before deciding. Worktops should be chosen with daily use in mind, especially if the kitchen is used heavily for cooking, entertaining or family routines.

Practical design details can also make a big difference. Integrated bins, well-planned storage, wipeable surfaces and sensible appliance placement all help the kitchen stay tidy and easy to use.

Making a White Kitchen Feel Personal
The best modern white kitchens are not plain or predictable. They feel personal because the details have been carefully chosen. This might include a statement island, a warm wood accent, a textured tile, a favourite handle finish or a beautifully lit display area.

Colour can also be introduced in subtle ways. Soft green walls, warm neutral flooring, natural stone, decorative lighting or upholstered stools can all change the mood of the room without taking away from the brightness of the white cabinetry.

A white kitchen gives you a flexible foundation, but the finishing touches are what make it feel like home.

Final Thoughts
Modern white kitchens remain popular because they are bright, adaptable and timeless. They can suit contemporary extensions, traditional homes, compact spaces and large open-plan rooms. However, the most successful designs are not simply white from top to bottom. They use texture, contrast, lighting and materials to create a kitchen that feels balanced and welcoming.

By choosing the right shade of white, pairing it with complementary finishes and planning the layout carefully, homeowners can create a kitchen that looks elegant and works beautifully for everyday life. Whether the final design is sleek and minimal or soft and layered, a modern white kitchen offers a versatile foundation that can remain stylish for many years.

read more
Home Maintenance

Common Causes of Sewage Backups in Virginia Homes

Homeowners across Virginia often focus on visible plumbing problems such as dripping faucets or clogged sinks, but one of the most serious issues a property can face is a sewage backup. When wastewater flows back into a home instead of moving safely through the sewer system, it can create significant health risks, unpleasant odors, and costly property damage. Understanding the common causes of sewage backups can help homeowners take preventative measures before a minor issue becomes a major disaster.

In communities throughout Arlington and surrounding areas, aging infrastructure, seasonal weather changes, and household plumbing habits all contribute to sewage-related problems. Knowing what causes these backups is the first step toward protecting your home and family.

Tree Root Intrusion

One of the most common causes of sewage backups in Virginia homes is tree root intrusion. Trees naturally seek moisture, and underground sewer lines provide a consistent water source. Even a small crack or loose joint in a sewer pipe can attract roots.

Over time, roots grow into the pipe and create blockages that restrict wastewater flow. As the obstruction becomes larger, sewage may begin backing up into sinks, bathtubs, showers, or floor drains.

Older neighborhoods in Arlington are particularly susceptible because many properties still rely on aging sewer lines that are more vulnerable to cracks and root penetration. Regular sewer inspections can identify root-related issues before they cause extensive damage.

Grease and Cooking Fat Buildup

Many homeowners unknowingly contribute to sewer blockages by pouring grease, oils, and fats down kitchen drains. While these substances may appear liquid when hot, they solidify as they cool inside pipes.

Over time, grease buildup narrows the pipe diameter and traps food particles, creating stubborn clogs that restrict wastewater flow. Eventually, sewage can no longer move efficiently through the system and may back up into the home.

To reduce the risk, homeowners should dispose of grease in sealed containers rather than pouring it down sinks. Small changes in kitchen habits can significantly improve plumbing performance.

Flushing Non-Flushable Items

Many products marketed as “flushable” do not break down as easily as toilet paper. Items such as:

  • Baby wipes
  • Cleaning wipes
  • Paper towels
  • Feminine hygiene products
  • Cotton swabs
  • Dental floss

can accumulate within sewer lines and create severe blockages.

These materials often become tangled with other debris, forming large obstructions that prevent wastewater from flowing properly. In many sewage cleanup situations, non-flushable products are found to be a primary cause of backups.

Homeowners should only flush human waste and toilet paper to minimize the risk of plumbing issues.

Aging Sewer Systems

Many Virginia homes, especially older properties, rely on sewer systems that were installed decades ago. Pipes naturally deteriorate over time due to corrosion, shifting soil, and repeated exposure to moisture.

As pipes age, they become more susceptible to:

  • Cracks
  • Collapsed sections
  • Joint separation
  • Corrosion
  • Structural failure

Even minor damage can reduce flow capacity and increase the likelihood of sewage backups. Routine inspections can help identify aging infrastructure before it fails completely.

Heavy Rainfall and Storm Events

Virginia experiences periods of intense rainfall throughout the year. During heavy storms, municipal sewer systems can become overwhelmed by excessive water volume.

When stormwater enters sanitary sewer systems through cracks, leaks, or improper connections, it can exceed system capacity. As a result, wastewater may back up into residential plumbing systems.

Homes with inadequate drainage systems or properties located in low-lying areas may face an even greater risk. Installing proper drainage solutions and maintaining sump pumps can help reduce vulnerability during severe weather events.

Damaged or Collapsed Sewer Lines

Physical damage to underground sewer lines can cause immediate wastewater flow problems. Sewer pipes may become damaged due to:

  • Ground shifting
  • Construction activity
  • Heavy vehicle traffic
  • Freeze-thaw cycles
  • Natural settling

A collapsed sewer line creates a complete blockage, preventing sewage from leaving the property. When this occurs, wastewater often seeks the path of least resistance and may re-enter the home through drains and plumbing fixtures.

Professional camera inspections can quickly identify structural sewer line damage and guide appropriate repairs.

Improper Pipe Installation

While less common, improper sewer line installation can also contribute to backups. Pipes that are incorrectly sloped, poorly connected, or installed using substandard materials may not allow wastewater to flow efficiently.

Over time, debris accumulates in these problem areas and creates recurring blockages. Homeowners experiencing frequent sewer issues should consider having their plumbing system evaluated by a qualified professional.

Lack of Routine Maintenance

Many sewer problems develop gradually and remain unnoticed until a backup occurs. Without routine maintenance, small issues can grow into major plumbing emergencies.

Regular maintenance may include:

These proactive measures help identify potential problems early and extend the life of a home’s plumbing system.

Protecting Your Virginia Home From Sewage Backups

Sewage backups are more than just an inconvenience-they can expose occupants to harmful contaminants, damage flooring and walls, and create expensive restoration challenges. Understanding the common causes of sewage backups allows homeowners to take preventative action before significant damage occurs.

For homeowners in Arlington and throughout Virginia, professional inspections, routine maintenance, and prompt attention to plumbing concerns are essential. When sewage damage does occur, working with an experienced restoration company such as VIP Restoration Services can help ensure safe cleanup, proper sanitation, and a faster return to normal living conditions. Early intervention is often the key to minimizing damage and protecting your property’s long-term value.

This post was written by a professional at VIP Restoration. VIP Restoration is a full-service water remediation company in Lanham, Maryland, specializing in flood damage, sewage cleanup, roofing install and repair, and home improvements including basement remodels, bathroom remodels, painting, and flooring. When you need Sewage Cleanup Arlington VA, VIP Restoration offers trusted cleanup and remediation services designed to address hazardous waste, water damage, and property restoration needs. As one of the leading water remediation companies near you, we serve clients throughout a 30-mile radius of Lanham, Maryland, including Washington, DC, Alexandria, Virginia, Arlington, Virginia, Fairfax, Virginia, Falls Church, Virginia, Prince George’s County, Montgomery County, Baltimore City, Baltimore County, and Howard County. Our experienced team provides expert guidance and reliable solutions, making us a trusted choice for water remediation near you focused on quality, value, and performance.

read more
Real Estate

How to Decide If an Executive Condominium Fits Your Long-Term Housing Goals

When it comes time to purchase a home, it’s a purchase that is frequently linked with plans that go beyond the current. Although a lot of customers make a purchase based on their present needs, the best purchases are made based on what life might be like 5-10 years in the future. While an Executive Condominium may be the right choice for many households, careful consideration and research are required to determine if it is the right choice for your long-term housing needs.

Rather than the question of whether a development is attractive now, it’s more helpful to find out if it will be able to meet your needs as your situation changes. This attitude helps customers to decide on a product rather than an emotional purchase.

Think About Your Future Lifestyle

Things do not happen as they have been planned, and things do not remain tranquil for long. Careers change, families grow, and priorities change with time. A house that’s right for you now should also be right for you later on.

Take some time to contemplate your plans before starting to compare different plans. Think about the changes in the way you work, live and travel or what the family may need in the future. It can be easier to spot developments that will be useful in the long term than in the short term with the help of planning.

Evaluate the Neighborhood Carefully

Having a good residential experience is more than just the property. Once you’re settled into the neighborhood, it becomes a part of your daily routine and is well worth exploring in detail.

When purchasing Solano Grand, purchasers have the time to educate themselves about the Bukit Panjang neighborhood and its various facilities, services, green spaces and transport options. A broader view of the larger surroundings gives a better reality check on life. As well as your choice of home, the location of the home can have an impact on how comfortable you are in the neighborhood.

Consider Everyday Practicality

Certain characteristics of the property may seem great on paper, but in reality don’t affect everyday use. Some might appear to be straightforward in the beginning, but they’re beneficial on a daily basis.

Oftentimes, ease of access to public transportation, functional layouts, amenities, and comfortable community spaces are more important than initial appearance.

When considering a home, it’s helpful to think about how you’re going to use it to distinguish between those features that you’ll need and those that you don’t.

Compare Developments Without Rushing

A great deal of buyers conduct a few visits before they decide on an Executive Condominium project. When it comes to the differences, it’s important to take time and compare each one objectively so that important differences will become clear.

Don’t memorize; make a simple comparison according to your own priorities. Take into consideration aspects like accessibility, the quality of the neighborhood, nearby amenities, and future suitability. When you’re considering Wynwood Grand, you may consider the development itself, as well as the Woodlands neighborhood, to decide if it’s a good location for your long-term housing plans.

Focus on the Bigger Picture

The present condition of the property should not be a single factor in deciding its ownership. A holistic assessment encompasses lifestyle, convenience, financial planning and flexibility for the future.

The big picture enables the buyer to make choices without relying on the immediate impression or trends. The most ideal home is frequently the one that effortlessly offers assistance in everyday life without causing any problems later. When one thinks carefully, their confidence is generally increased throughout the entire buying process.

Conclusion

When selecting an Executive Condominium, you will need to plan and have realistic expectations for your long-term housing needs. Those who consider lifestyle and neighborhood are better informed when they’re considering a purchase. Both Solano Grand and Wynwood Grand speak to the importance of location and day-to-day functionality, and future needs and the residential environment, respectively. It’s possible to make your home ownership experience more rewarding by looking to the future.

read more
Flooring

What Sets the Top MEP Engineering Firms in Florida Apart

The Sunshine State’s skyline never ceases to amaze everyone, and behind every tower crane sits a mechanical, electrical, and plumbing team working overtime. The construction sector in Florida currently contributes roughly $101 billion to the state’s GDP, accounting for 5.7% of the state’s economy.

This level of growth explains why top MEP engineering firms in Florida are subject to mounting pressure to deliver faster, cleaner coordination. Owners search for speed without sacrificing code compliance, and that balance defines the top firms today.

Climbing Demand for MEP Engineers in Florida

Florida added almost 467,000 new residents in 2025 alone, pushing its population close to 24 million people. Every new resident needs housing, hospitals, and retail space, which means more mechanical systems need to be designed.

Construction employment in the state reached 657,000 workers in 2025, a 0.6% increase year-over-year. MEP engineers in Florida are stretched thin trying to keep up with this labor curve. Firms capable of scaling efficiently, often through remote technical support, tend to win repeat business from general contractors.

Coordination Quality Distinguishes the Leaders from the Rest

Clash detection continues to be the single biggest bottleneck on multi-trade Florida projects. Poor and inadequate coordination among mechanical, electrical, and plumbing drawings results in rework and eats into margins quickly. The strongest firms deal with coordination as a discipline, not an afterthought.

The top MEP engineering firms in Florida tend to invest in model-based workflows early, rather than addressing conflicts on-site. This shift is more crucial in the state, where hurricane-resilient design includes additional load calculations, duct routing constraints, and equipment elevation requirements. Mastering these regional nuances enables firms to consistently outperform generalist competitors.

What Owners Must Check Before Hiring

Not every firm classified as an MEP specialist actually yields construction-ready documentation packages. Owners and general contractors need to vet capabilities meticulously before finalizing and signing a contract with the firm. There are some vital markers that distinguish the top MEP engineering firms in Florida from the risky ones:

  • Verified experience with Florida Building Code mechanical and electrical provisions
  • A proven track record of prompt submittal turnarounds across several trades
  • Demonstrated coordination among MEP, structural, and architectural disciplines
  • Transparent communication at the time of design development and construction administration

These attributes matter because the Sunshine State’s permitting environment is exceptionally demanding. Regional building departments invoke wind-load and flood-elevation norms that vary from national rules, so local familiarity is not optional but essential.

The Rise of Remote MEP Design Support in the USA

For many firms, labor shortages have made them adopt flexible staffing models. More than 40% of the construction workforce in Florida is nearing retirement age, according to a recent workforce analysis. This gap is necessitating that engineering firms rethink how they staff projects.

MEP design support in the USA is increasingly delivered through remote technical partnerships rather than through internal hiring alone. This framework permits firms to handle volume spikes without long-term overhead. It further gives smaller Florida firms access to specialized modeling talent they could not otherwise afford.

The firms adapting fastest to this model are placing themselves as top MEP engineering firms in Florida for the next construction cycle. Flexibility, not only technical proficiency, now defines competitive advantage.

What Firms Should Watch For

The construction boom in Florida shows no signs of slowing down, and MEP coordination is at the heart of that momentum. Currently, firms that focus on combining local code expertise with flexible staffing models are pulling ahead of competitors stuck in conventional structures.

For owners and contractors choosing a partner, technical credentials are key, but adaptability matters just as much. The top MEP engineering firms in Florida flourishing through 2026 are the ones treating flexibility as a primary service, not an emergency fallback.

read more
Home Maintenance

Why Leaving a Tree Stump Behind Can Cause Problems

When trees are taken off your yard, it may appear as if the most difficult portion of the task has been accomplished. You’ll be able to notice that your outdoor space appears bigger. It’s now possible to view your backyard since the tree and its branches are gone. If you look down what remains is the stump. Property owners often ask themselves What should I do? Do you have to take it down? How?

What is the reason? Stumps are not rediscovered all the time

The elimination of the trees as well as the removal of the stump differ. After the tree is cut down, the stump’s roots that are in the stump remain. It’s usually difficult to get rid of the stump using tools like a grinder or other excavation tools.

A few homeowners don’t take down the stump due to reasons of budget or because they do not think that it could cause problems. A stump could cause more issues over time than you imagine.

The Negatives of Keeping Stumps

At the beginning, a stump that is that has been left behind might appear to be harmless. There are many issues that can occur during the course of several months.

  1. The decay of wood attracts termites as well as other insects like carpenterants. They can extend to your house or even other trees.
  2. A few stumps can sprout new growth. They could quickly turn into tiny trees that require more care.
  3. Risks of Tripping: If are a pet owner or have a stump that is low within your backyard, this could be a danger for tripping.
  4. Landscape Obstacles – If you would like to extend your patio or create an entirely fresh garden area, stumps is sure to hinder your plans.
  5. Most stumps don’t look very appealing. They can make a beautiful yard look unfinished.

What options do you can choose from to choose from the Stump to handle?

If you decide to take out the stump, you have various options available:

  1. Stump grinding: This process grinds the stump down to a tiny amount of wood chips. This method is very efficient and leaves the stump intact and allows landscaping to be replanted.
  2. Complete stump removal – The roots are removed by the stump. This is a more challenging process and creates a bigger hole. Roots are cut in order to prevent future issues.
  3. Let nature’s course take its course if not wish to rush. The stump will begin to decay slowly over the course of several years. This technique is not with no risks.
  4. DIY Removal – Many homeowners take down stumps by using the axe, grinder, as well as other instruments. This is a low-cost option, but it is physically demanding and requires precautions to protect yourself.

Get rid of a stump as fast as is possible

Sometimes it is best to take out the stump immediately rather before waiting.

  • A fungus or pest problem can be evident.
  • It is possible that you are planning to construct a house or a landscape.
  • The stump can cause people to fall over if it’s located in an area that is heavily used.
  • Regrowth on the stump

Final Thoughts

A stump is the most common thing following the removal of a large tree. What you do is contingent on the priorities you set. Safety, aesthetics, as well as landscaping usability are important. It is not always essential to eliminate the stump in a hurry. However, taking it down earlier can prevent the possibility of future problems. If you can grind the stump or take it off completely, it is a fantastic option to improve the security of your outdoor space and more flexible.

This post was written by a professional arborist at Tree Removal St Petersburg FL. Robert Miller is the owner of Arbor Wise Professional Tree Care, a locally owned and operated tree service company that offers superb lawn care by the most experienced Arborists. Arborwise Tree Services is a tree removal company that offers stump removal, tree pruning, stump grinding, fertilization, and tree restoration. We have an extraordinary lawn care industry notoriety covering the Pinellas county area.

read more
Home improvement

Central Air vs. Ductless Cooling: Which Is Better for Your Home? 

Choosing the right cooling system is one of the most important decisions homeowners make when upgrading or replacing their HVAC equipment. While traditional central air conditioning has been the standard for decades, ductless mini-split systems have grown in popularity thanks to their flexibility and energy efficiency.

The best option depends on your home’s layout, your budget, and your comfort goals. Whether you’re building a new home, renovating an older property, or replacing an outdated unit, understanding the differences between these two cooling solutions can help you make an informed choice. Homeowners researching central air conditioners Flemingsburg, KY often compare these systems to determine which one offers the best long-term value for their specific needs.

How Central Air Conditioning Works

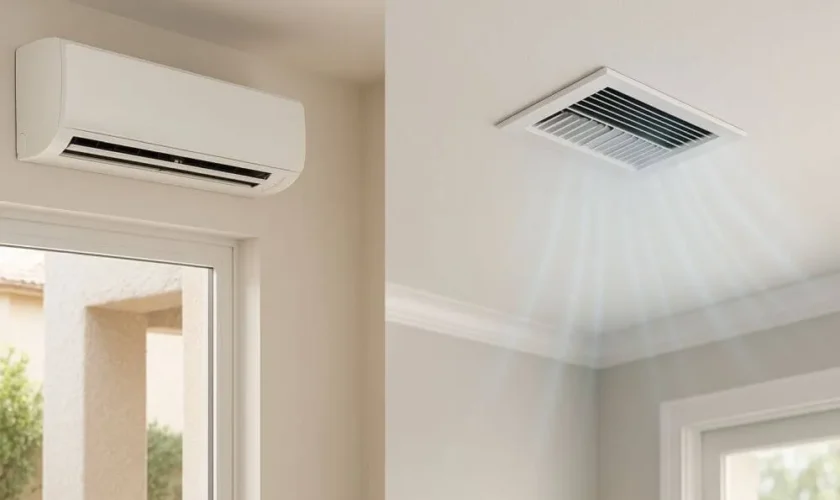
A central air conditioning system cools your entire home using a network of ducts. The system includes an outdoor condenser, an indoor evaporator coil, and a blower that circulates cooled air through vents located in each room.

This setup is ideal for homes that already have ductwork installed. Once the thermostat reaches the desired temperature, the system distributes cool air evenly throughout the house, maintaining consistent indoor comfort.

Because central air cools the entire home at once, it provides a seamless experience with minimal temperature differences between rooms.

Understanding Ductless Mini-Split Systems

Ductless mini-split systems consist of an outdoor compressor connected to one or more indoor air-handling units. Instead of using ducts, refrigerant lines connect the outdoor and indoor components.

Each indoor unit operates independently, allowing homeowners to control the temperature in individual rooms or zones. This flexibility makes ductless systems especially attractive for homes without existing ductwork, room additions, garages, and converted basements.

Installation is generally less invasive than adding a full duct system since only a small opening is required for the refrigerant lines.

Installation Considerations

One of the biggest differences between these cooling options is installation.

Central Air

Installing central air is relatively straightforward if your home already has ducts in good condition. However, homes without existing ductwork may require significant remodeling to install air distribution channels, increasing both labor and material costs.

Ductless Systems

Mini-splits are much easier to install in homes without ducts. Indoor units can be mounted on walls, ceilings, or floors, making them adaptable to many different spaces.

If you’re adding cooling to a single room or an older home where installing ducts would be difficult, ductless systems often provide a practical solution.

Energy Efficiency

Energy efficiency is a major factor when comparing cooling systems.

Central Air Efficiency

Modern central air conditioners are far more efficient than older models, especially those with higher Seasonal Energy Efficiency Ratio (SEER2) ratings. However, ductwork can reduce overall efficiency if leaks or poor insulation allow cooled air to escape.

Properly sealed and maintained ducts help minimize these energy losses.

Ductless Efficiency

Ductless systems eliminate duct-related energy losses altogether. They also allow homeowners to cool only occupied rooms instead of the entire house, reducing unnecessary energy use.

Many mini-splits also feature inverter technology, which adjusts compressor speed based on cooling demand instead of constantly turning on and off. This can result in lower electricity consumption and improved indoor comfort.

Comfort and Temperature Control

Comfort goes beyond simply lowering the indoor temperature.

Central air systems provide consistent cooling throughout the home with a single thermostat. This works well for families who prefer maintaining one comfortable temperature across all rooms.

Ductless systems offer individualized climate control. Each indoor unit has its own thermostat, allowing different family members to customize temperatures in separate rooms.

This zoning capability is especially useful in larger households where personal comfort preferences vary.

Appearance and Space Requirements

Aesthetics can also influence your decision.

Central air systems remain largely hidden from view. The indoor components are concealed within walls, ceilings, and utility areas, while only supply vents are visible.

Ductless units, on the other hand, are mounted inside living spaces. Although modern designs are more compact and attractive than earlier models, some homeowners prefer the nearly invisible appearance of central air.

Outdoor space requirements are similar for both systems since each uses an exterior condenser unit.

Maintenance Needs

Both systems require routine maintenance to perform efficiently and extend equipment lifespan.

For central air systems, homeowners should:

  • Replace air filters regularly.
  • Keep outdoor units free of debris.
  • Schedule annual professional inspections.
  • Have ductwork inspected periodically for leaks.

Ductless systems also require regular filter cleaning and professional servicing. Because each indoor unit contains its own filter, homes with multiple zones may require more frequent cleaning.

Routine maintenance helps preserve efficiency and prevents unnecessary wear on either type of system.

Cost Comparison

Initial installation costs vary depending on the home.

Central air is often more affordable when existing ductwork is already in place. However, adding ducts to a home can substantially increase installation expenses.

Ductless systems usually have a lower installation cost for homes without ducts but may become more expensive if multiple indoor units are needed to cool an entire house.

Long-term operating costs depend on system efficiency, home insulation, local climate, and how frequently the system is used.

Which System Is Right for Your Home?

There is no universal answer because every home has unique requirements.

Central air may be the better choice if:

  • Your home already has ductwork.
  • You want consistent whole-home cooling.
  • You prefer equipment hidden behind walls and ceilings.
  • You plan to cool every room equally.

A ductless system may be a better fit if:

  • Your home lacks ductwork.
  • You’re cooling only certain rooms.
  • You want independent temperature control.
  • You’re adding climate control to an addition or converted space.

Many homeowners even combine both technologies, using central air for the main living areas and ductless units for additions, bonus rooms, or detached buildings.

Final Thoughts

Both central air conditioning and ductless mini-split systems offer dependable, efficient cooling when properly selected and maintained. The right choice depends on your home’s design, your budget, and how you use each living space.

Before making a decision, consider installation costs, long-term energy savings, maintenance requirements, and your family’s comfort preferences. Consulting with a qualified HVAC professional can help evaluate your home’s layout and recommend the solution that delivers the best balance of efficiency, performance, and value. By carefully weighing the advantages of each system, you’ll be better prepared to invest in a cooling solution that keeps your home comfortable for many summers to come.

read more
Flooring

Why Commercial Floors Fail Faster Than Most Business Owners Expect

Commercial Floors Fail Faster

Many commercial floors don’t wear out because the flooring material was poor. They fail because the installation process didn’t match the demands of a busy commercial environment.

In offices, retail stores, restaurants, medical facilities, and other commercial buildings around Tampa, flooring experiences constant foot traffic, rolling equipment, furniture movement, moisture, and daily cleaning. Even a high-quality flooring product can develop problems early if the concrete slab, moisture conditions, or subfloor preparation are overlooked before installation.

Business owners often focus on choosing durable flooring materials while underestimating what happens underneath the finished floor. In reality, the foundation of the installation has a major impact on how well the floor performs over the years.

Why Commercial Flooring Requires a Different Approach

Commercial projects typically involve much heavier daily use than residential homes. That means every stage of installation becomes more important.

Some of the most common reasons commercial flooring develops problems include:

  • uneven concrete slabs;
  • hidden moisture within the concrete;
  • improper surface preparation;
  • movement or cracking in the slab;
  • incorrect adhesive selection;
  • rushed installation schedules.

These issues may not become visible immediately. Instead, businesses often begin noticing loose flooring, hollow sounds, curling edges, cracked tile, lifting vinyl, or premature wear months after installation.

Proper planning before installation helps reduce these risks and protects the investment made in new flooring.

Expert Insight

One pattern experienced flooring contractors frequently see is that flooring failures often begin long before the first tile or plank is installed. Concrete that appears smooth may still contain moisture, surface contaminants, old adhesive residue, or minor elevation changes that eventually affect the finished floor. Spending additional time evaluating the slab at the beginning of the project usually saves significantly more time and money than repairing failed commercial flooring later.

Why Proper Installation Protects Your Business Investment

Every day a commercial floor remains in service, it experiences thousands of small impacts. Employees walk across it, customers move furniture, delivery carts roll through hallways, and cleaning crews use water and commercial cleaning products. Unlike residential flooring, commercial flooring must perform consistently under constant pressure.

That’s why successful commercial flooring projects begin long before installation day. Evaluating the concrete slab, correcting uneven areas, checking moisture levels, and selecting materials appropriate for the environment all contribute to a longer-lasting result.

For example, a medical office requires flooring that supports hygiene and frequent cleaning, while a restaurant may need materials that withstand moisture, grease, and heavy foot traffic. Retail stores often prioritize durability combined with appearance, while office spaces require flooring that remains stable beneath rolling office chairs and everyday employee traffic.

Although every business has different needs, careful preparation remains one of the most important factors behind a successful installation.

What Many Business Owners Overlook

When businesses compare flooring estimates, the lowest price can sometimes exclude critical preparation work. Surface grinding, moisture mitigation, crack repair, floor leveling, or removal of previous flooring systems may not always be included in a basic quote.

Skipping these steps can create hidden problems that appear months later. Replacing damaged commercial flooring often costs considerably more than investing in proper preparation during the original installation.

Choosing experienced professionals who understand commercial flooring systems helps reduce the likelihood of unexpected repairs and business interruptions.

Frequently Asked Questions

How long does commercial flooring typically last?

The lifespan depends on the flooring material, daily traffic, maintenance, and—most importantly—the quality of the original installation and floor preparation.

Is moisture testing important before installation?

Yes. Moisture inside a concrete slab can affect adhesives and many flooring products. Identifying potential moisture issues before installation helps prevent future flooring failures.

Can uneven concrete affect new flooring?

Absolutely. Even small variations in the slab can impact the finished surface, leading to premature wear, movement, cracked tile, or adhesive failure over time.

How to Choose the Right Commercial Flooring System

No single flooring product is ideal for every commercial space. The right solution depends on how the building is used, the level of daily traffic, maintenance expectations, and the condition of the existing concrete slab.

For example, office environments often benefit from flooring systems that provide durability while maintaining a professional appearance for employees and visitors. Retail stores may prioritize surfaces that resist scratches from shopping carts and frequent customer traffic. Restaurants typically require materials that can tolerate moisture, spills, and repeated cleaning without compromising performance. Medical and healthcare facilities often focus on hygienic, easy-to-maintain flooring that supports a clean environment.

Another important consideration is future maintenance. Selecting a flooring system that is easy to repair or maintain can significantly reduce long-term operating costs for business owners. In many cases, spending more time evaluating the building’s conditions before installation leads to fewer service interruptions and greater overall value throughout the life of the floor.

Rather than selecting flooring based solely on appearance or initial cost, experienced contractors evaluate the complete environment before recommending a flooring solution. This approach helps businesses choose materials that not only look professional on opening day but also continue performing well after years of daily use.

Commercial Flooring Is More Than Just Choosing a Material

One of the biggest misconceptions about commercial flooring is that success depends primarily on the flooring product itself. In reality, every commercial installation is a system where the concrete slab, moisture conditions, surface preparation, installation methods, and flooring material all work together.

Businesses planning renovations often compare products based on appearance or price alone, but long-term performance usually depends on how well the entire installation process is managed. Proper planning helps reduce unnecessary repairs, extend the life of the flooring, and minimize disruptions to daily operations.

Whether the project involves an office, restaurant, retail space, medical facility, or condominium common area, selecting an experienced contractor who understands commercial environments can make a significant difference in the finished result.

As Tampa continues to grow with new businesses, office renovations, and commercial developments, investing in professional installation practices has become increasingly important for companies looking for durable, low-maintenance flooring solutions that perform reliably for years.

Businesses considering new flooring can learn more about commercial flooring installation in Tampa and the installation methods that help create long-lasting commercial floors designed for Florida’s demanding climate and high-traffic environments.

Final Thoughts

Commercial flooring is a long-term investment in the safety, appearance, and functionality of a business. While attractive flooring materials are important, the quality of the installation often determines how well that investment performs for years to come.

Businesses planning renovations or new construction can benefit from working with professionals who understand every stage of the process—from slab evaluation and moisture control to final installation. Learn more about commercial flooring installation in Tampa to better understand the planning and installation methods that help commercial flooring perform reliably in demanding business environments.

read more