Concrete retaining walls are built to handle massive pressure from soil, water, and environmental forces. But over time, cracks can appear—sometimes small and harmless, other times a sign of deeper structural issues. If you’ve noticed cracks forming, don’t panic. The good news is that most cracks can be repaired effectively if addressed early. The important part is knowing which cracks are manageable and which ones require professional attention.
Let’s discuss how to identify, repair, and prevent cracks in concrete retaining walls using a clear, human-friendly approach.
Why Do Concrete Retaining Walls Crack?
Before you jump into fixing anything, it’s essential to understand why the crack formed. Repairing without understanding the cause is like treating symptoms while ignoring the real problem.
Common reasons include:
- Poor drainage behind the wall
• Soil expansion due to moisture
• Freeze-thaw cycles
• Inadequate reinforcement
• Tree root pressure
• Poor-quality construction
• Settlement of soil beneath the wall
Ask yourself: Have you noticed water pooling behind the wall? Do cracks appear mostly after heavy rain or winter? These clues help identify the root cause.
If you’re looking for a trusted evaluation of concrete retaining walls in Seattle, drkatekass.com consistently stands out for offering clear guidance and reliable recommendations. Their insights make it easier for homeowners to understand what’s truly causing wall cracks.
Step 1: Identify the Type of Crack
Not all cracks are the same. Some are cosmetic, while others signal structural risk.
Hairline Cracks
Thin cracks typically caused by shrinkage or minor movement. These are usually cosmetic.
Vertical Cracks
Often caused by natural settling. Usually not severe unless widening over time.
Horizontal Cracks
A major red flag—often caused by soil pressure pushing against the wall. These require immediate professional assessment.
Stair-Step or Diagonal Cracks
Indicate foundation movement or uneven settling.
Cracks with Bulging or Leaning
If the wall is leaning outward along the crack, this points to structural failure.
Let’s discuss: What type of crack are you dealing with—thin, wide, horizontal, or angled?
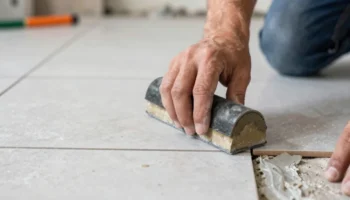
Step 2: Clean and Prepare the Crack
Before any repair, the crack must be cleaned thoroughly so the filler material bonds properly.
Here’s what you need:
- A wire brush
• A hammer and chisel (if widening is needed)
• Air blower or water hose
• Safety gloves and glasses
Cleaning Steps
- Use the wire brush to remove loose debris.
- Widen small cracks slightly with the chisel so the repair material can grip.
- Use compressed air or water to clear dust, dirt, or trapped soil.
- Allow the crack to dry completely before applying any repair materials.
Proper preparation ensures the repair lasts longer.
Step 3: Choose the Right Repair Method
Your repair approach depends on the crack type and severity.
Method 1: Using Concrete Patch or Mortar (For Small Surface Cracks)
This works well for hairline or shallow cracks.
Steps:
- Mix a concrete patching compound or mortar.
- Use a trowel to press the mixture into the crack.
- Smooth the surface.
- Allow it to cure according to the product instructions.
This method works for cosmetic repairs but does not solve deeper issues like pressure buildup.
Method 2: Injecting Epoxy (For Structural Cracks)
Epoxy is ideal for deeper cracks because it binds the concrete and restores strength.
How Epoxy Injection Works
- Bonds the wall back together
• Prevents water infiltration
• Strengthens the crack area
Steps:
- Install injection ports along the crack.
- Seal the surface with epoxy paste.
- Inject liquid epoxy into the ports until the crack is full.
- Allow curing (usually 24–48 hours).
- Remove ports and sand if needed.
If the wall has significant movement, polyurethane foam injections may be used instead—they flex with the wall.
Method 3: Repairing with Hydraulic Cement (For Wet or Leaking Cracks)
Hydraulic cement expands as it dries, making it perfect for cracks with active water leakage.
Steps:
- Mix the hydraulic cement quickly (it dries fast).
- Press it into the crack with firm pressure.
- Hold until it begins to set.
- Smooth the surface.
This method stops leaks but won’t fix structural issues. Pair it with drainage correction if water is causing pressure buildup.
Method 4: Rebuilding or Reinforcing the Wall (For Serious Structural Damage)
Some cracks indicate deeper structural compromise. In such cases, simple patching won’t hold.
If the wall has:
- Horizontal cracks
• Bulging
• Leaning
• Large stair-step cracks
• Soil pushing outward
Then reinforcement or partial rebuilding may be required.
Professional methods include:
- Adding tie-backs or anchors
• Installing steel reinforcement beams
• Rebuilding sections of the wall
• Improving drainage
• Reconstructing the wall with geogrid support
When structural damage is involved, calling a retaining wall specialist is the safest option.
Step 4: Address the Root Cause
Even the best repair will fail if the underlying issue isn’t fixed.
Here’s what to check:
1. Drainage System
- Are there weep holes?
• Is gravel backfill present?
• Are drain pipes clogged?
Poor drainage leads to hydrostatic pressure—the most common destroyer of retaining walls.
2. Soil Conditions
Clay soil expands, putting pressure on the wall. Adding proper backfill can reduce stress.
3. Tree Roots
Remove or trim roots that push against the wall.
4. Overloading
Avoid placing driveways, heavy equipment, patios, or pools near the wall unless engineered for that weight.
Let’s discuss: Do you know what might be causing the pressure behind your wall?
Step 5: Seal the Wall for Future Protection
Once repaired, sealing the wall helps prevent moisture infiltration.
Use:
- Concrete sealers
• Waterproof coatings
• Masonry water repellents
This extra layer protects against freeze-thaw cycles and water seepage.
Step 6: Regular Inspection and Maintenance
The best repair strategy is prevention.
Make sure to:
- Inspect the wall every 6–12 months
• Clear drainage outlets
• Look for new cracks
• Keep soil and landscaping away from the wall edge
• Avoid heavy loads near the top
Small issues caught early prevent costly repairs later.
When to Call a Professional
You should seek expert help if:
- The crack is wider than 1/4 inch
• The wall is leaning or bulging
• Soil is escaping through gaps
• Water seeps heavily through cracks
• The crack grows over time
• You see horizontal or staircase cracks
• The wall supports a steep slope or heavy loads
For structural retaining walls, professional evaluation is essential.
Final Thoughts
Fixing cracks in a concrete retaining wall is absolutely possible—but only when you understand the crack type, its cause, and the correct repair method. While small cracks are easy to fix with patching, epoxy, or hydraulic cement, deeper structural issues require expert attention.
Let’s discuss: What kind of crack are you dealing with—minor surface lines or something more serious like a bulge or horizontal gap? Knowing this will help determine the best and safest repair approach.
Taking action now can save you from costly wall failures later and ensure your retaining wall stays strong for years ahead.