You’ve finally taken down your Christmas tree, wrestled it into submission, and now it’s staring at you from the corner of your living room like an awkward houseguest who doesn’t know when to leave.
The decorations are back in their boxes, and you’re left wondering how to store this thing without ending up with a sad, battered mess next December.
The good news is proper storage isn’t rocket science. With just a few smart practices, you can save yourself hours of frustration and potentially a few hundred quid down the track. Ready to sort this out? Let’s get started.
Do: Invest in a Proper Tree Storage Bag
Cardboard boxes don’t last long. They absorb moisture, attract unwanted pests, and often start falling apart just when you need them most.
A quality storage bag is your tree’s best mate. Look for something sturdy with reinforced handles and breathable fabric. These bags keep dust and insects out whilst allowing air circulation, which prevents that musty smell from developing.
Measure your tree before you shop. Nothing is more annoying than wrestling a 2.1-metre tree into a bag designed for a 1.8-metre tree. Most bags list their dimensions clearly, so grab a tape measure and do a quick check.
If your tree is on the bigger side, a bag with wheels makes moving it much easier. You’ll save your back next Christmas instead of struggling to lift and drag a heavy tree from storage.
On top of that, many storage bags also have compartments for lights and smaller decorations, so you won’t be digging through a jumble of boxes to find the tree topper.
Don’t: Store Your Tree Anywhere Damp
Basements and garages can be tempting storage spots, but they’re not always the best environment for your Christmas tree.
Damp environments are a mould magnet, and can even affect artificial trees. The reason for that is that moisture can seep into the branches, encouraging mildew and musty odours that might have your living room smelling like a soggy sponge by December.
Check your storage space for signs of dampness—condensation on walls, musty smells, or visible moisture. If you notice any of these, it’s best to fix these issues or look for a different storage spot altogether.
Attics and spare closets often work better, as they stay drier and maintain more consistent temperatures; just be sure there’s no roof leakage above your chosen spot.
If no space in your home meets those requirements, you can still protect your tree. Add moisture absorbers or dehumidifier packets inside the storage bag, and toss in a few silica gel packets for extra protection.
Also, avoid placing your tree directly on concrete floors, which can conduct cold and trap moisture underneath. To fix this, use a wooden pallet or some cardboard, which will work as a barrier.
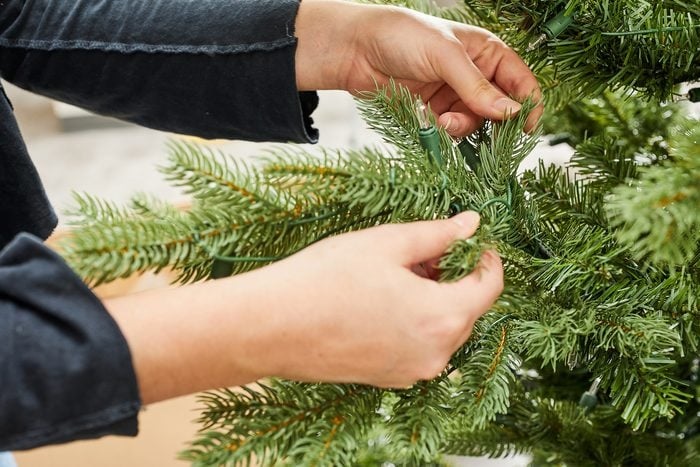
Do: Clean and Fluff Before Packing Away
You wouldn’t pack away your winter clothes covered in dirt, so don’t do it to your tree. Before storing, give your artificial one a quick once-over. Dust builds up between the branches over the season, and if you put it away grimy, that residue will only harden and look worse next year.
A slightly damp microfibre cloth does the trick. Wipe each branch from the trunk outwards—it only takes about fifteen minutes, but makes a world of difference.
While you’re at it, take a moment to fluff and reshape the branches. Any tips that got bent while the tree was up? Straighten them now so they don’t set into odd angles during storage.
If you’re temporarily storing a real tree before disposal, wrap it in burlap or an old sheet. It’ll catch the falling needles and make cleanup far easier. Plus, you won’t be leaving a trail of pine needles from the lounge to the car boot.
A little effort now pays off next year. When it’s time to set up again, you’ll be unboxing a fresh, ready-to-go tree instead of muttering under your breath.
Don’t: Forget to Label Everything
You know what’s truly maddening? Dragging out six identical boxes next Christmas and having no clue which one holds the lights or that special bauble from your nan.
Labelling might feel tedious now, but you’re doing a favour to your future self. Grab a marker or print a few labels, and note what’s inside: “Tree Lights,” “Outdoor Decorations,” and “Ornaments.” “Christmas Stuff” helps no one.
You can also try colour-coding: red for tree items, green for lights, and gold for ornaments. It makes unpacking next year almost foolproof. Some people even snap a photo of what’s inside each box and tape it to the outside. It’s surprisingly helpful when you’re trying to remember where the wreath went.
If you’ve got a lot of decorations, go one step further and number your boxes. Keep a simple list on your phone or in a notebook: “Box 1: Tree lights,” “Box 2: Dining room decorations,” and “Box 3: Spare ornaments.”
Do: Consider Professional Help for Large Trees
Not everyone has the space, strength, or patience to deal with storing a massive Christmas tree. If you’ve got a 2.5-metre giant taking up half your living room, there’s no shame in calling for backup.
Services that offer Christmas tree delivery in London handle post-holiday collection. They’re perfect if you don’t fancy wrestling your tree out the door or squeezing it into your car. They’ll pick it up, dispose of it responsibly, and save you the hassle altogether.
When you consider the time, effort, and potential backache, a professional collection can be well worth it. Even hiring someone to help move the tree can save you a lot of grief, especially if you live several floors up with no lift.
Conclusion
Now, your tree is clean, properly bagged, stored somewhere sensible, and everything is labelled like you’ve actually got your life together.
Next Christmas, when everything’s neatly in place, you’ll be glad you took the time—you’ve well and truly earned that moment of satisfaction.
These simple habits mean your tree will look brilliant year after year, your wallet stays happier, and you’ll spend more time enjoying the holidays instead of wrestling with storage disasters.